



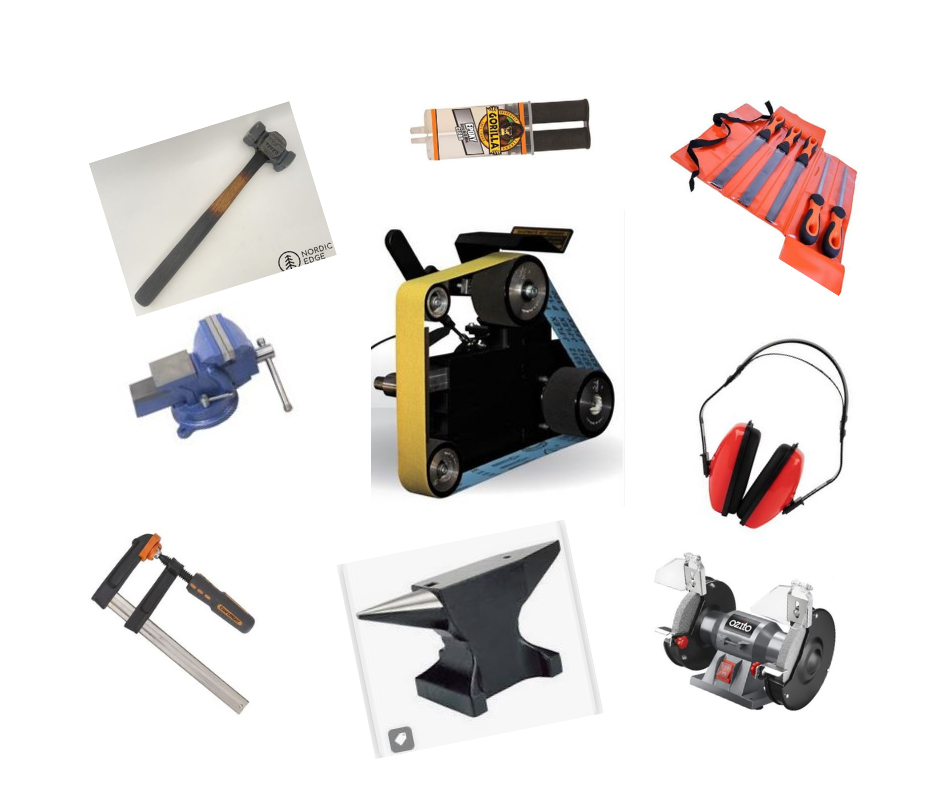
Here is a list of What I’m currently using.
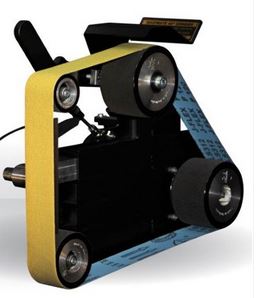
Shop Mate Variable Speed.
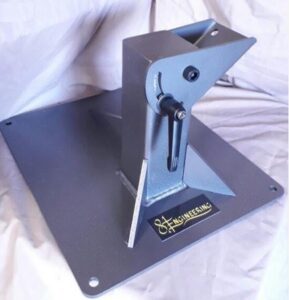
Tip. If you can afford it make sure you get this side tip accessory, they are amazing!
Angle Grinder.
What you need this for is cutting out the blade blanks from a larger piece of steel. What you do is fix into a vice and start slicing away to the template lines. It works but it’s noisy, dusty and somewhat dangerous.
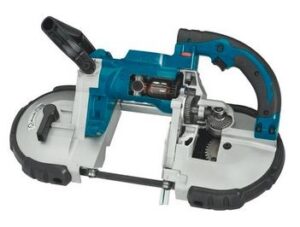
I prefer a band saw like this. I have mine mounted upright. It’s much more controllable, safer and less dusty. It costs more but is the preferred option if your wallet is fat enough.
Files.
Clamps.
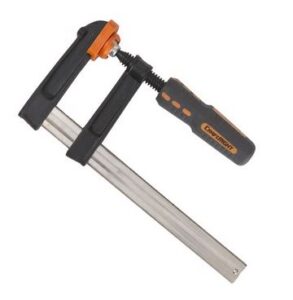
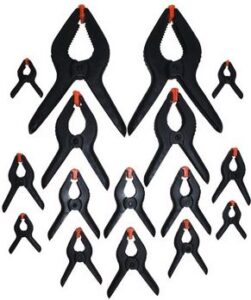
You will hear it said quite often but you’ll never have quite enough clamps. At least enough of the right size when you want it. I have a collection of std F-Clamps, G-Clamps and Spring Clamps of various sizes. It’s something you can start off with a cou[le of each and add to them as you go along. I find the budget range clamps are fine for what we need.
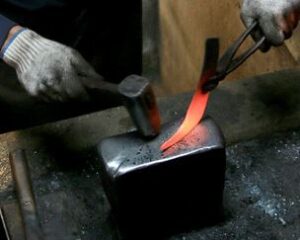
Forge.
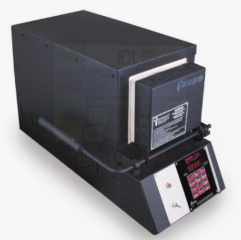
If you are heat treating your knives at home you must have a forge. There are a few examples of people using two propane torches, one on each side. You can only heat treat basic carbon steel like 1084 with this technique but thats all, and the results are a bit hit and miss. I’ve used a coal hearth, little tiny gas forges, large gas forges and my latest one is an electric kiln/forge I built myself. It’s much easier to control the temperature.
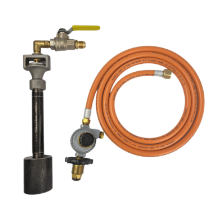
One of the most popular kilns is a Paragon Kiln at around AU$4500. You can see why people try making their own! Or you can buy a little gas kit AU$170 and drop it into a fire brick surround to create a gas forge. If all this seems like too much hard work or too expensive you can always send your roughed out blade blanks to a commercial heat treat service. Whatever you choose to do it is a very important area of knife-making that needs to be taken serious.
Small Toaster Oven.
The reason you need this is to temper your blade after hardening back down to a managable hardness/toughness ratio. This process takes out the brittleness so it doesn’t chip or crack during use. I’ve found a small toaster oven like this seems to work fine. I modified one to include a Digital PID Temperature Controler. I have created a YouTube Vid on my channel on how to do this.
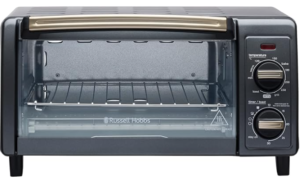
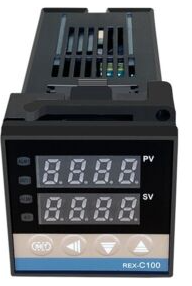
Another way to temper your blade is to place it in your home oven. Drop it in at the right temperature for the desired time and cycles and Bobs your uncle. You could use a propane torch to warm the spine back up the desired temperature. You would need to watch the colors travel from spine down to the cutting edge to achieve the hardness/toughness ratio. There is salt bath tempering, plate tempering and the list goes on. For this article you only need a cheap toaster oven.
Hammers.
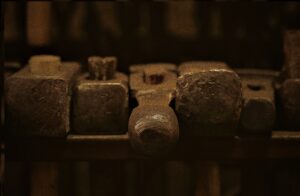
I use any hammer I have lying around. This collection here is from an old blacksmiths shop. You don’t need specialist hammers!
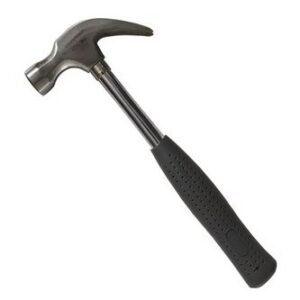
I even use one like this from Bunnings for $5.00 :0)
PPE.

So you need to get into a Zen like state to make them useful….Ha. Actually it’s a serious matter. You need hearing, facial, and body protection depending on what you are trying to do. I make sure I have ear muffs, goggles or a face shield of some sort, a respirator and either an apron or boiler suit.
Once I have my workshop up and running again I will be using one of these. It’s expensive Your Health is Super Important
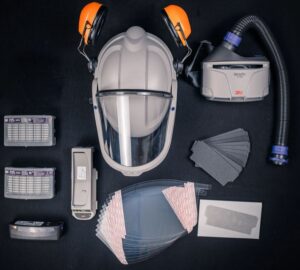
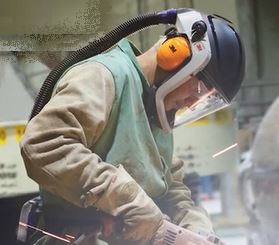
I know these as Versaflo Systems, 3M Make them.
Measuring Tools.
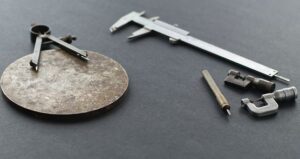
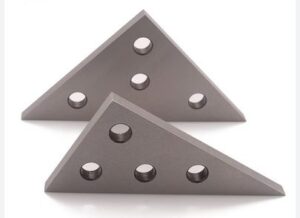
This shouldn’t be overlooked. A good set of calipers is a must to keep your work consistent across all aspects of your knife-making. You’ll measure the average thickness of your blades, depth of drill holes, diameter of drill holes….and the list goes on. There is also the need for a standard straight edge ruler and perhaps a set of square and 45 degree engineers plates like these. They are so useful.
Glues.
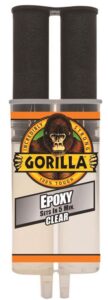
Glue is a consumable that you’ll change brands and types as you go along. In short I have always used an epoxy glue with a solution and a hardener. I have used special expensive glues and cheaper glues. In my view a two part epoxy from Bunnings, like this glue works perfectly fine.
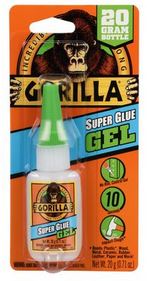
There is also a need for Superglue for temporary bonding 2 surfaces together like finishing the front edge of handle scales for example. I’ve even used it to bond a handle scale to a layer of tape on top of a steel plate for surface grinding. A few tubes of this is so useful. These happen to be the Gorilla Variety but any of them are fine.
Bench Grinder.
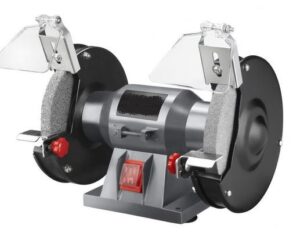
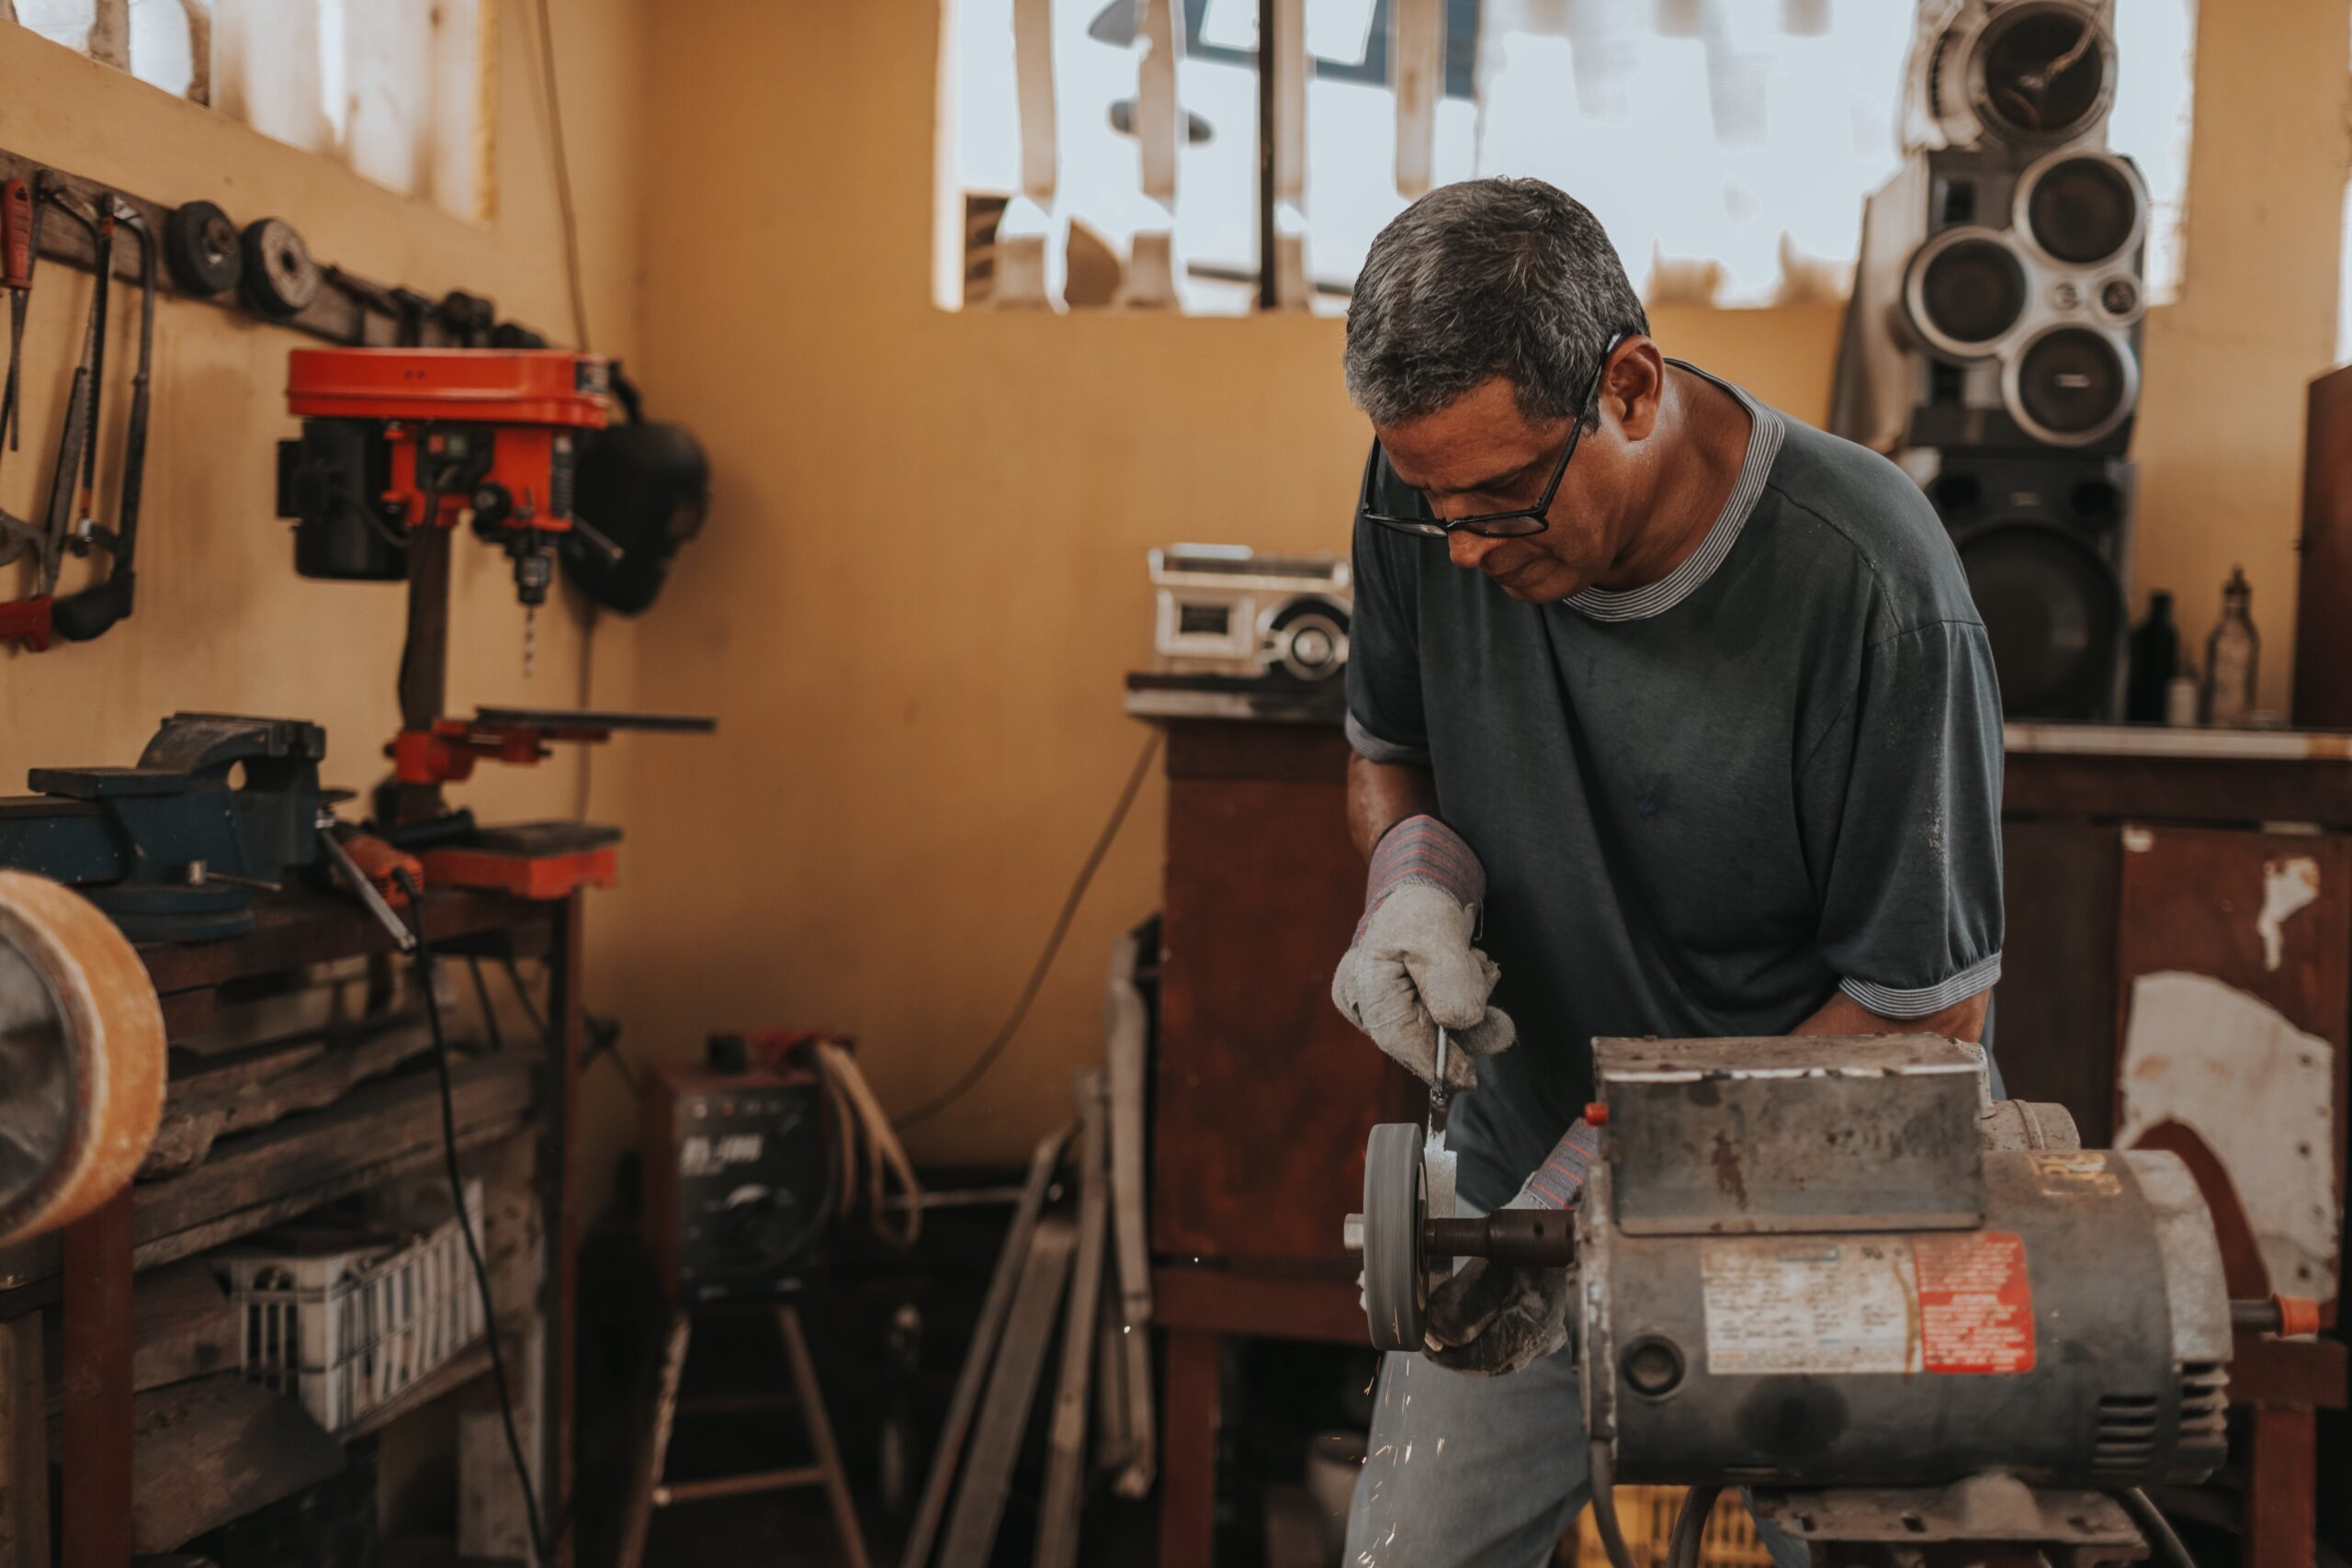
Arguably the most dangerous thing in the blade-smiths workshop. But it depends on what you are using it for and how you are using it. There are many tales of accidents both minor and major. I purposely use a low powered one for two reasons. The first is that if you happen to get wrong and the work-piece is dragged into the grinder or buffer, the chances are it will stop instead of grabbing and hurling it 1000mph at the wall or somewhere on your body or head. The second is it kind of stops you over buffing something. The bonus is they are also much cheaper to buy. I use this cheapy.
Woodworking Tools.
You don’t need many of these really. All you need them for is cutting wooden blocks for scales. Maybe an Axe if you want to really make a mess of things, ha, ha :0)
Sharpening Tools.
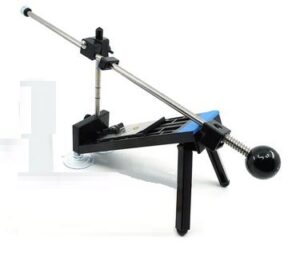
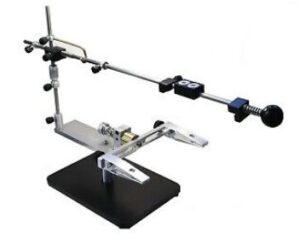
This a big subject all by itself. However, to keep it short you have to decide what kind of sharpening you intend to do. There are water wheels, paper wheels for the bench grinder, you can use the belt grinder and so it goes on. My recommendation is to get a fixed plane sharpener like this one. There plenty of choices on the market from terribly made cheap ones to very expensive engineered options. I use this one in the second image which was made in Ukraine. It’s a no brainer. Easy to use, repeatable results and not too expensive. Ideal for the beginner.
Conclusion.
I’m not sure there is any conclusion really except to say it is possible to make a knife with very basic tools. One of these days I’ll test this out and write an article on it. In the meantime the premise is to buy the best tools you possible can. Starting with the belt grinder, then the forge and work your way down.
Knife-making is a lot of fun and you end up with a functional, usable tool you can be proud of.
As always, happy camping :0)
Intro.
I’ll try not to get too nerdy about the metallurgy of what happens to steel for it to be transformed from soft steel into hard and brittle steel, however some technical detail needs to be covered for it to make sense to the novice knife-maker.
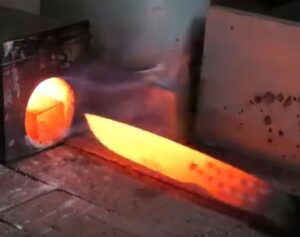
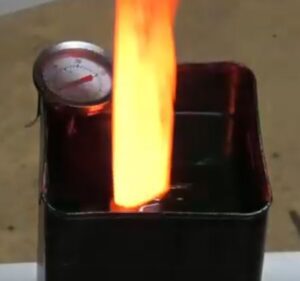
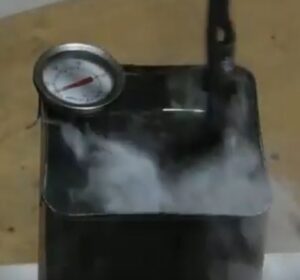
Quenching is the process of rapidly cooling down a certain type of steel so that it turns into a hard brittle steel known as either Austenite and Martensite. Once question that occasionally gets asked is “Can you harden any type of steel?” and the answer is no. Read on to find out more.
Consider this lot if you are thinking of making your own knives and more pertinent to this article quenching your own blades.
The Role of Quenching Oil.
No matter what solution you use, the whole idea is to remove heat from the steel as quickly as possible and as evenly as possible. If things are unstable in some way, perhaps the steel has different and uneven thicknesses. Perhaps it’s too thin or slightly too long for the forge for a successful heating up phase. If there is anything like this going on the steel may not get as hard and brittle as desired, they might even end up getting badly warped!
When the hobbyist knife-maker does all this there are so many things that may not be at the optimum preparation. So quenching may not always be successful. Knife making manufacturers on the other hand have perfected their processes and can usually create a the perfect environment for hardening and tempering their blades.
How many types of Quench Mediums are there?

Actually there are oodles of solutions to quench steel in, too many to mention here but here are the main ones you can try. It’s all based on what the elements are of that particular type of steel are and choosing the right quenchant to get the best out of your blade. A basic High Carbon steel for example has Carbon, Manganese, Phosphorus & Sulfur. The recommended choice for quenching this steel is in a luke warm oil, approx 200c (in the U.S Parks 50 is popular and in Australia Houghton’s K Quench oil seems to be the one to use). I can’t vouch for these but the following solutions have been known to be used for quenching:
Let’s take a closer look at them.
Vegetable Oils.
As you would expect these come from plants. Because the solutions are created by a bio degradable organic source they are becoming quite popular in the eyes of the environmental knife-maker, if there is such a thing! Actually they can produce good results with certain steels and they are less toxic. The quenching is slower compared to other mediums but all in all it’s not a bad choice.
Mineral Oils.
The use of these is quite common in certain areas of production. The big oil companies like Chevron & Exxon produce them. Personally I haven’t seen any knife-makers using this stuff so I suspect it’s for much larger operations in the big factories. They are very stable oils to use but they do have a much lower flashpoint than other oils so take care people if you use them at home, be careful how you use them, keep yourself safe.
Polymer/Synthetic Quenchants.
Being a synthetic product they are produced with particular steel in mind. D2 is often named in the heat treat process with this quenchant. It is quite stable and able to control the cooling rate compared to there solutions.
Engine Oil.
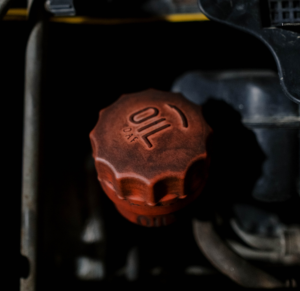
Engine oil is sometimes used for quenching knife blades. The viscosity of these old oil is pretty heavy, therefore it has a much more gradual cooling rate. 01 and D2 are tool steels you could quench in this oil. The question is, why would you do that? I guess if you are on the bones of your arse, then perhaps that’s what you need to do. It’s full of impurities and you won’t get a consistent quench.
Animal Fats.
Ha, wtf you might say. Quite a ways back in time blacksmiths used to use pig fat or the fat from around the kidneys of cows to quench tool and knife blades. The fat from around a cows kidneys is what we might associate in recent years as fat to fry fish and chips in…mm, lovely flavors, today apparently it’s unhealthy. Anyway, it’s not necessary to try quenching blades in anymore. The results are inconsistent as best. It’s quite flammable and stinks :0)
Water Based Quenchants.
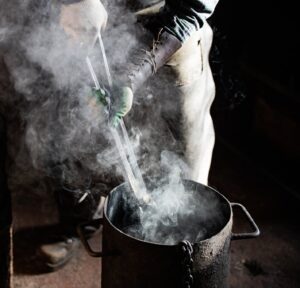
Straight water. This has been used a lot in the past and continues to be used. There are many YT channels that use water and only water to quench their steel in. You need to be very careful using it though. It is very aggressive and only good for particular alloys. The most obvious one is W1, this is water hardening tool steel, perfect. On the other hand I have seen makers quenching all kinds of spring steel and alloys they have no idea what the steel elements are. They seem to achieve very good results.
Note: Makers using straight water often employ whats called an interrupted quenching process. This involves a technique of dipping the cutting edge in the water and taking it out and re-dipping it multiple times to slow down the process and reduce the stress and the likelihood of cracking the steel. It takes a bit of practice but can be quite effectively.
Air/Plate Quenching.
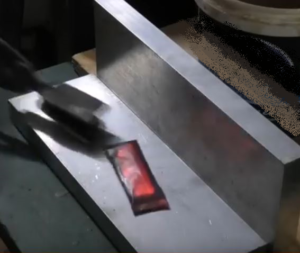
These are exactly as they are described. Air hardening steels are brought up to temperature and then cooled in still air and cool down at their own rate. A2 is a tool steel that is air hardening. If you can get the temperature right you can make yourself a nice little knife out of A2.
Plate quenching employs the use of two thick Ali plates (25mm or so) , as soon as the steel comes out of the forge it goes straight between these plates which suck the heat right out of it. A steel like AEB-L uses this technique. You might think so why bother with a high carbon steel and go through the messy, potentially flammable process with high carbon steel. One of the main reasons is you often need much higher temperatures to use this steel. Most home forges can’t do it.
What Actually Happens to the Steel During the Hardening Process?
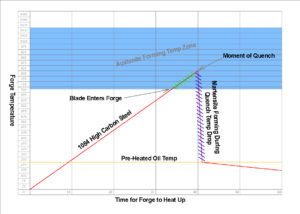
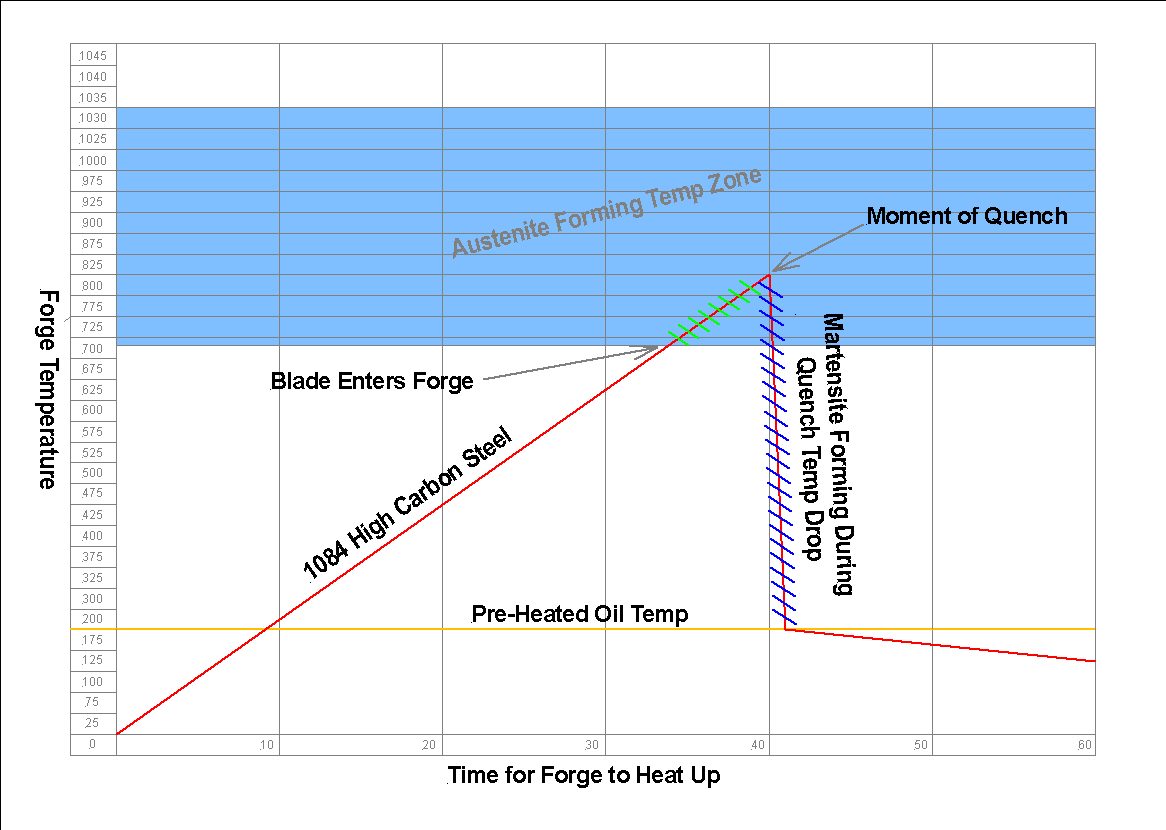
This little chart is a representation of a forge slowly heating up, actually it’s based on my own electric forge. It’s an example of how we heat treat 1084 high carbon steel. As the forge heats up to about 730c the steel begins to form Austenite. The blade goes in and quickly heats up to about 820c (I seem to get the best results at 820c). At this point the Quench takes place. This is where all the magic happens.
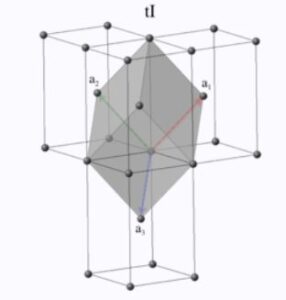 Body-Centred Tetragonal Crystal Structure
Nerd Alert: Sorry but this bit is very important to digest for anyone to fully understand what’s happening here. During the Austenite forming stage the steel, on a micro level, changes it’s crystal structure to what’s call face-centered cubic crystal. At this point the steel is non-magnetic which has a higher carbon solubility compared to it’s original state. Then comes the Quench where the rapid and from the steels perspective, quite violent cooling is done (I use Houghtons K Quench). This is where the steel changes from Austenite to Martensite. The martensite now has whats called a body-centered tetragonal crystal structure. The violent cooling process prevents the Carbon atoms from leaching out of the crystal structure which then leaves you with the hard brittle steel of Martensite. If you drop the steel on a hard surface at this point it might break or chip, it’s that hard.
So there you are, nerdiness over and now you know what happens to steel during the Quenching process.
Tempering.
Although this article is about ‘quenching’ the tempering process does need a mention. I will probably write an article dedicated tempering. For now though here is a brief overview.
The tempering process allows for the adjustment of the steel’s hardness while improving its toughness. It is a vital step to take out some of the brittleness created during the hardening process. Different tempering temperatures result in varying combinations of hardness and toughness, allowing manufacturers and the home knife-maker to meet the requirements of a particular type of steel and ultimately in the production of tools, machinery components, certain structural elements across different industries or the thing we love most and that’s Knives.
Conclusion
You can see how involved it can get to heat treat a knife. The thickness of the blade, the type of solution, the temperature, the quench time, the agitation in the tank and finally the tempering all make a difference to the end result. Your own forge may have a slight difference in the temperature reading compared to another forge. It really does take lots of practice to get it right and repeatable.
Now you can rush to your workshop and heat treat that blade you made sometime ago!
Hold your horses. This process has the potential to do some damage if you don’t take lots of care about what you are doing. The solutions can flash up like flame thrower and the workshop can get filled with smoke in no time. So do your research and watch a lot of YT videos. Wear your PPE, some kind of hard wearing face visor, mouth mask and goggles is a minimum. Have a fire extinguisher on hand, one appropriate for use on oils. Keep yourselves safe people.
As always, happy camping :0)
The Wonderful Art and Craft of Knife Manufacturing. From Raw Steel to Awesome Knives.
Intro.
Who really knows when the first steel knife was made, but we do know it was more than a couple of thousand years ago, it may have even been right at the time iron was produced somewhere between 3000 & 5000 BCE. Before that stone knives were made and definitely run into the tens of thousands of years, it is probably in the hundreds of thousands of years ago!
Fast forward to today and we have automation like this happening.
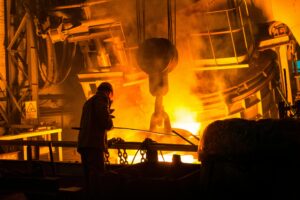
This article explores the process taken to create a knife from raw steel to the finished piece. We go through the following points of creation:
Choosing the right Kind of Steel.
Just about all knife blade steel is manufactured by major steel manufacturing plants on a global scale. They range from basic high carbon steels to high end stainless steels. If you have read any of my other posts you’ll notice that the mention of what the knife will be used for has an influence on the type of steel the blade should be made from. These days, unless you are a newbie knife-maker there isn’t much point of choosing a knife made from a basic high carbon steel. This is for the simple reason that it will rust if it’s not looked after too well. The novice knife-maker will usually start with a simple high carbon steel because it can be heat treated in the home forge or even with a couple of map gas propane torches.
These steels have unique properties which affect their longevity. Edge retention, corrosion resistance, toughness etc.. As a rough guide, the use of the knife in relation to the type of steel might go something like this. Low use basic camping use a budget stainless steel will suffice, perhaps 13Cr17Mov for example. Medium use camping & bush-craft use might need a blade made from D2 OF 440C perhaps. Then up to a steel like M390 or VG-10 for a serious hiking/survival knife.
Preparing the steel (stock removal).
There are two main methods for shaping the blade, stock removal & forging. For stock removal we need to make sure the stock is flat and parallel. This makes grinding the bevels a lot easier, it’s important to keep them the same size. The way to make them flat and parallel is via a surface grinder, or if you are experienced enough you might be able to do it on the grinder itself, on the flat plate.
Forging the Blade.
Forging involves heating the steel to a high enough temperature so we can slowly start shaping it into the desired shape. Of course this method needs about of extra space and an Anvil. Once the steel has been roughly shaped to its final dimensions it still needs to be ground down to its final shape. After this, and depending on the finish you are after will depend if you need to flatten it on the surface grinder or not. I’m not really a fan of it but it’s become ‘fashionable to leave part of the face of the blade with hammer marks and color from the heat treating process.
Shaping the Blade.
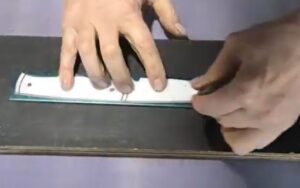
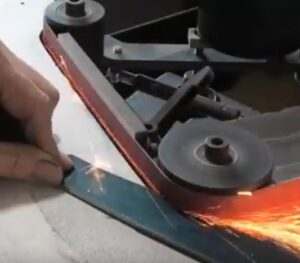
This is a simple process and each knife-maker has their own variation on how they do it. Most of us cut out a template to mark out the final shape. Then we use the grinder flat on the rest to accurately bring the steel down to the template lines. Some people use an angle grinder to take off the majority of steel, I prefer to use a metal band saw. What you choose as your blade shape is entirely based on your own artistic flair. I’d say, be bold and do whatever takes your fancy (within reason).
Rough Grinding the Bevels.
This part of the process is arguably the hardest element to master and the most important. I could probably create a post solely dedicated to bevel grinding. However, for this post I’ll abbreviate the process.
Again, knife-makers have their own proffered process and they range from the pure skill of hand grinding to all kinds of fancy jigs to create ‘the perfect bevels’. I have created four different jigs in an attempt to make things perfect and repeatable. You can see me using two of them on my YouTube channel. As long as you follow basic bevel grinding principles there is no right or wrong way to do it. That being said you need to make sure you are doing it safely. Before you start grinding it’s advisable to mark a line down the center of where the final cutting edge will be. This will help keep the bevels the same on both sides. As a rule the grinding is done by placing the spine on the rest with the edge uppermost so you can see the center line as the grinding starts to remove steel. You start by removing steel at the cutting edge at a fairly steep angle and slowly working your way down the where the grind lines are fairly close to where they will end up. You’ll need to keep checking the progress of the grind as you go. It does take quite a lot of practice to get it right, it could take months and in the end years to really perfect it to within 1/1000 mm.
Heat Treatment.

So now the blade has been shaped and bevels rough ground close to the final grind lines, now it’s time to heat treat it. Process includes:
Weather the blade has been forged or made from high carbon steel it need ‘normalizing’. This is a process where the steel is heated 2 or 3 times to 875 C (1607 F) and letting air cool to black. What normalizing does is take out any stress that may have built up in the forging process and create a finer grain in the steel. This will produce a better blade steel.


Once normalizing has been done we can get onto the most important aspect, the actual hardening process. Various types of steel have recommended temperatures to reach before quenching can take place. Most steel manufacturers have a guide available for heat treatment and tempering. In theory, if you follow the guide exactly, you will reach the maximum possible blade hardening. Hardening is measured by using the Rockwell Scale. As a rough guide hardened steel for a bush craft knife made from a basic high carbon steel is normally around 58-60 HRC.
If you need to heat treat stainless steel, it’s a whole nother ball game. A lot of hobbyist knife makers send their S/S shaped blades out to a professional heat treating service where they guarantee to get the maximum performance form that piece of steel. To do this though you would need to do, maybe 20 blades at a time to make it worthwhile. I have built my own electric heat treat oven that might just be able to do the job on a stainless blade.
So lets say it’s a piece of high carbon steel like 1084 we would bring it up to 815 C / 1500 F, then quickly quench in a proper quenching oil or if you are on a budget use luke warm Canola oil (oil is 40-60 C / 104 – 140 F)
Temper the blade in an oven (your kitchen oven will work ok for this), do it for 2 hours x 2 at 200 C (390 F). Following this process will give you a good hardness for general purpose kitchen and outdoor knives.
If you are not familiar with the heat treating process the process of hardening and tempering it may seem odd that you make the steel as hard as possible and then bring the hardness back down to something less brittle. This might seem strange but this process is much easier to manage than trying to reach the perfect hardness and toughness in one go. Actually I’ve never seen anyone do it so it might not even be possible to do it it one go!
Finishing the Bevels.
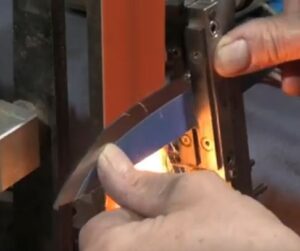
Once the heat treatment has been completed it’s time to clean up the blade and finish grinding the bevels. This is where the craftsman needs to be careful. By continuing to grind the bevels down to their final size it creates a lot of heat, enough heat to ruin the heat treatment you so carefully completed. So as not to ruin the blade we keep a bucket of water next to the grinder so after every 1 to 2 passes on the belt grinder we dip it in water and suck the heat right out of it. Once you have checked the symmetry of the bevels and are happy with them you can get onto sanding the flats down to a shiny finish, be sure to dip the blade even with this process. You can hand sand the flats or use a surface grinder if you have one. Hand sanding takes a bloody long time though!
Choosing & fitting the handle scales.
In my view this is where your own design and style come together which is unique to you. There are so many options, actually it’s limitless. It’s so easy to fall into the standard shape and color that you end up with something you can buy from Blade HQ for $50 for example. So after all of your effort and care and hard work put some thought into it, be bold and create something memorable. Personally I like G-10. It’s impervious to water and most chemicals and if it’s fitted correctly it’s very hard wearing. Then there is stabilized wood. A piece of wood that is impregnated with resin to stop it from deteriorating.
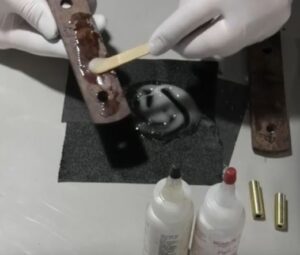
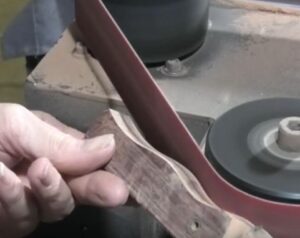
The fitting process can be a little tricky as they have to be shaped down to within cooee of the final shape and then glued with a 2 part epoxy and steel pins (sometimes makers use Corby Bolts). Then it needs to be clamped and left overnight to achieve a strong bond. You can see by this picture of me going through the process how messy it could get. Care needs to be taken not to get the epoxy all over the blade. Once the glue has hardened off it’s time to do the final shaping of the handle. This is done by using a finer grit belt and often used on a slack part of the grinder machine so the finish is much softer and smooth, it’s easier to control as well.
Finishing and Polishing.
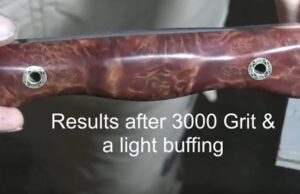
We are nearly there, the scales are on and shaped down their final shape, now they need to be polished. This might be by a buffing machine with finishing compound or perhaps a tongue oil if it’s a wooden handle. Basically we are doing the final touches to make sure any imperfections are taken out. Often in a rush to get this knife finished, this final part of the whole process is not completed properly. I often say, this is what separates the hobbyist from the very, very good hobbyist. The very good ones can sell their creations, no problem.
Sharpening.
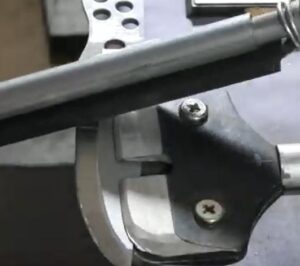
Is it a fancy butter knife you want or something you can dress a deer with? I think it will be the latter.
There are many, many ways to sharpen a knife. On a grinder with a fine grit belt, a Tormek machine, a Wicked Edge system, wheels that fit on your bench grinder, Apex Edge style system, whetstones, diamond stones and the list goes on. Just about all of these systems work really well, some take a bit more getting used to than others but in the end they all work. The problem comes when you try to put an edge on that is too fine for the intended use of the knife, and vice versa. Once again this balance between sharpness, toughness and edge retention comes into play again. So be sure to study what edge geometry you should be using and the final sharpening process that suits your needs. Check out my other post dedicated to sharpening knives.
Final Thoughts.
From my point of view knife-making is a great little hobby. Not the cheapest to get into but can be very rewarding. It’s a constant quest for perfection that almost never achieved. But that’s what keeps us going. For me it’s a balance between Art and Design. Some knives are solid beasts designed for the hardest tasks and some are delicate gentleman’s pocket knives designed for not much more than cutting the skin off an apple.
Check out this nice little fixed blade I came across this week. The Ka-Bar Snody Boss. For little over US$100, it has awesome blade steel CPM S35VN, Stone-wash Drop Point Blade, Leather sheath. Wow, I think I’ll buy one for myself.
As always, happy camping :0)

Intro.
This is not a nice subject to talk about but as a knife enthusiast it is something that is important to be aware of. I live in Perth, Western Australia, by all accounts it’s a safe city with very few homicides. For the past 9 years the average annual homicide rate in Western Australia is 95.7. If we compare this the a similar sized city in the U.S (Orlando for example, it’s double our figure), sorry Orlando! I was brought up in the U.K, Birmingham for example had 135 murders in 2023. Information as to just how many of these are related to knives remains unknown at the time of publication.
It’s pretty safe to say that knife crime around cities and urban areas on a global scale is on the increase. It has an impact across many facets of life. Individuals, families, extended families and the communities all face significant challenges dealing with these horrific assaults or even deaths.
If it reaches enough people perhaps this article can serve as a reminder to be careful whilst out and about and more importantly remind us to nurture our children and indeed the next generation to try and understand our place in society and get along with people rather than fighting with them.
Knife Crime, Who is Responsible?

Knife crime is everywhere. The fact that a knife can be carried around in a concealed manner presents a problem to society when these individuals have bad intent. It’s obvious to say but these kind of crimes can be triggered by two people arguing over something that gets out of control, to robbery, to organized crime to violent drug gangs protecting their patch and even self-defense comes into play. What finally motivates a person or gang to carry out such a crime is the 64 thousand dollar question.
My little article regarding this issue is not intended to find solutions to this complex problem but to bring awareness to the different contexts and motivations.
Background Environment.

It’s a really complex issue, the contributing factors that will exacerbate knife crime have been known for years but still the statistics keep showing a rise in the problem. The socioeconomic problems of people on low incomes and limited opportunities, lack of employment, inadequate or non-existent community support are all environments where people desperate for extra money have to live. Purely by the fact that these people need to live in cheaper areas are more likely to face someone brandishing a knife than someone in a more affluent gated community. Some people are looking to escape the hum drum life without much hope often eventually see themselves either dealing drugs or a user of them or both.
Of course there are the obvious serious criminal elements of society like gangs who like to control certain home patch areas often look to their own backyard to recruit young vulnerable new members who act as runners (run drugs from one area to another) and become entrenched into that way of life.
Consequences.
This kind of crime permeates across countless areas of life. The physical injury or death is one thing but the impact it has on communities and society in general has far reaching affects. Families, friends, neighbors, everyone connected suffers in some way.
Psychological Trauma.

The immediate victim, if they survive, will need to endure the fallout, at the very least, the anxiety caused by the event. They may even suffer (PTSD). But it doesn’t stop there. Witnesses often suffer similar mental stress. Then of course there are the family members who are psychologically damaged by it, in some cases long term. Survivors may face anxiety, depression, and other mental health challenges. Witnesses, especially if they are friends or family members, may also suffer emotional distress.
The consequences of knife crime extend beyond the immediate physical harm caused to individuals. Communities affected by high levels of knife crime experience increased fear and a diminished sense of security. Additionally, the impact on a broader scale affect strained healthcare systems, increased policing costs, and a negative impact on the overall well-being of communities.
Law Enforcement and Policy Responses.

With the greatest respect there isn’t much the police can do to prevent these occurrences. Law enforcement is more about dealing with the problem after it occurs. I have an article on the legality of carrying knives around in society (for Australia). These are just laws, rules and regulations, they are there as a deterrent but the severity of the punishment if you break these laws are not enough. Desperate people do desperate things to get whatever it is they want, especially when it comes to gang related incidents.
Certain community policing initiatives, and targeted neighborhood programs for young people in high-risk areas can help curb the threat of knife related crimes. In my view it takes a lot more than a band aid approach of finding things for youths to do, placing more police in the areas.
I think it needs to start at home and governments need to have a serious powerful approach of getting young families to interact in programs that teach the big picture of parenting and educate them on how important looking after our future through the care of our young people is.
If we can just interrupt the cycle of crime that keeps perpetuating itself through the years we might have a chance to turn things around. As I say it needs to have billions of dollars set aside to make it happen. I won’t hold my breath though.
Prevention and Intervention.

Conclusion.
It complicated eh? Listen, I’m not here to solve the communities social problems, particularly regarding knife crime. I wrote this article because I want people to be aware of the issue that can arise if knife enthusiasts don’t take care of their knives and let them leak out into the community. Having said that knives are a lot easier to get hold of than guns for example, at least in Australia that is, therefore keeping tabs on them and using them for they are made for keeps them safely in the hands of fisherman, campers, hikers and survivalists.
People like me love our knives in the sense of engineering, blade material, handle material, color, design and all that good stuff. Using them for anything other than the right thing doesn’t even enter our heads. Some of us are knife nerds with some sort of obsession about blades. For us it’s even Art!
Because we want to be able to collect them, camp, hike and survive with our bladed companions we want to see everyone do their bit for the community, educate our kids and help keep us all safe which at the same time can enable us knife people to continue to love our knives and use them wisely.
As always, happy camping :0)
Continue reading “Is it legal to Carry Knives Around in Australia?”