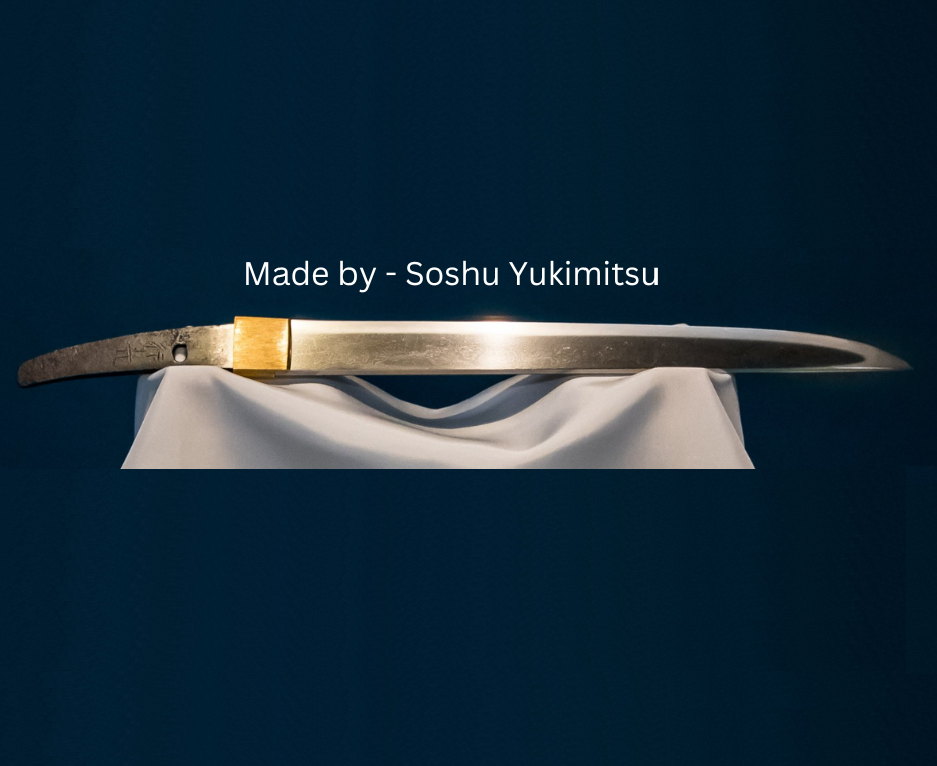
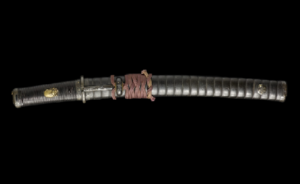
In the World of Edged Weapons there is nothing finer than a 500 Year Old Tanto Blade

In the World of Edged Weapons there is nothing finer than a 500 Year Old Tanto Blade

Recent Posts

The Sword Of Goujian – Simply Astonishing!


Intro.

Occasionally there is an ancient find that seems to defy the amount of time it’s been hidden from the world. The Staffordshire Hoard immediately comes to mind. It’s an Anglo Saxon hoard of silver and gold, the biggest find ever recorded. Despite it being buried for about 1300 years and some of it bent out of shape it’s in pristine condition. This sword Hilt is among the nicest pieces, the Sword Of Goujian is similar in it’s rarity and beauty, perhaps it even surpasses the Staffordshire Hoard as it’s much older.
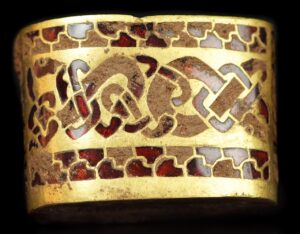
Part of a Sword Hilt found in the Staffordshire Hoard

Sword Of Goujian.

In October 1965 in Hubei Province, China a group of workers were digging along the side of the Zhang River Reservoir, Jinzhou in preparation for an aqueduct when they discovered a Tomb, in fact they discovered over 50 Tombs. For three months they focused on uncovering these Tombs. In total they found over 2000 artifacts tat were hidden from the light of day for over 2000 years.

In my view the most jaw dropping item found is The Sword Of Goujian. 
Background.

Yue, also known as Yuyue was a province in ancient China. Today this province stretches across Zhejiang, Shanghai and Jiangsu. Back in the day the original Capitol Kuaiji, today known as Shaoxing.

Back in the 6th century the Yue people began fighting with it’s neighbors the Wu people. In short this was because the Yue rulers saw themselves as decedents of the mythical emperor Yu the Great and the Wu rulers didn’t like this idea because they believed they had the right to claim ruler-ship over all the other regional rulers, so a large punch up ensued that went on for several decades until the famous Yue King Goujian teamed up with the Chu people, enemies of the Wu rulers, and coordinated a smash and grab tactic and became owners of some new land. Some six generations later the Chu and Chi teamed up and forced the Yue rulers to back off and share the land, bringing about the fall of Yue in 306BC.

So the Yue people took off heading South and created another kingdom called Minue. It only lasted for 150 years when a fellow in a dog collar, well you know, the equivalent of, mobilized an army and punched the Han people into next week and grabbed the land back and restored the Yue kingdom.

Anyway, in the middle of all this fuss ‘The Sword of Goujian’ was made for the king. He must have done a great job to be presented with a sword like this.

What is the Sword made of?

It was found complete with a wooden scabbard covered in black lacquer. It had such a good fit around the blade and where the scabbard meets the handle that it was almost air tight. They believe this contributed to the lack of tarnish and overall damage, and this is despite the tomb being under water for well over 2 millennia.

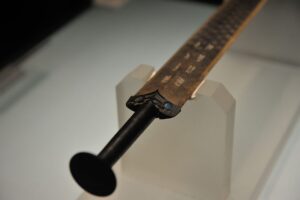
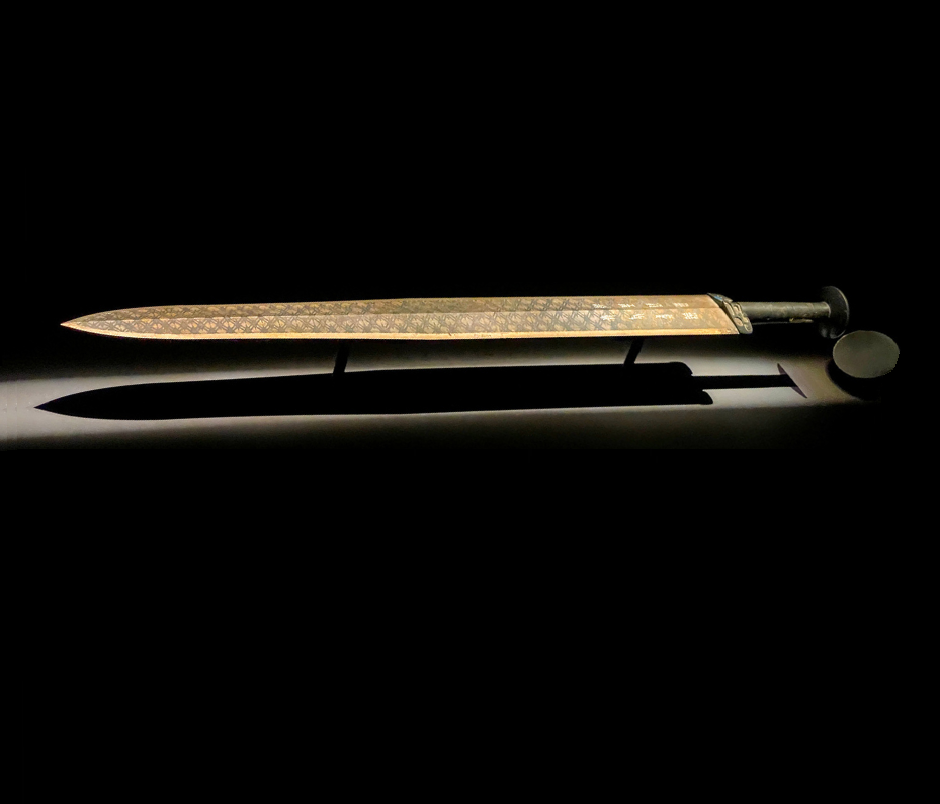
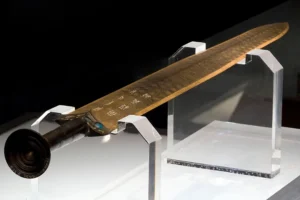
Due to its lack of tarnish the University of Fudan and The Chinese Academy of Sciences studied the make up of elements. The make up of elements are Copper, Tin, Lead, Iron, Sulfur and Arsenic. Sulfur and Arsenic only show up in very small amounts. The Sword is is made predominantly from Copper and Tin. The edge has more tin content, probably in an effort to help keep an edge on it. Seeing as it was presented as a gift to the king, maybe only in his death to lie beside him in his journey to the after life it was probably never used. As you can see the blade has this repeating rhombus pattern in what we can describe as yellow color for the main body and a brown color ranging from light to dark for the rhombus pattern.

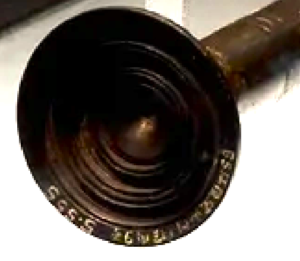
The handle is round and wrapped in silk, the pommel is a flat round disc with concentric circles.
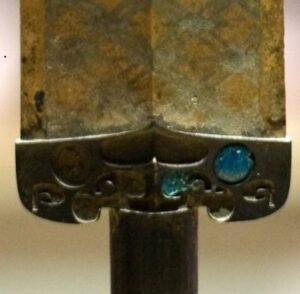
The Ricasso area has Blue Turquoise stones shown here, it’s lost a few but we can see how it would have looked when it was first completed.
Who did it belong to?

As we move down the Sword we get to the area where the characters are written on the face of the blade. On one side of the blade up near the ricasso area are eight characters in an old text no-one uses today. Six of the characters are directed at the King of Yue (Goujian) “made this sword for personal use” and the other two are said to be naming “Goujian” as the “King of Yue”.

This king was a very determined kind of character. King Goujian had a sort of undying commitment the the prosperity of his kindon and keeping everyone safe. No matter how many defeats he may have had he stayed strong and refused to give in. Within himself he developed an attitude of endurance, no matter what the hardships are be stron and determined. His people followed along and supported him. I guess this is one of the reasons they made a blade such as The Sword of Goujian for him.

Specs.

  • Sword Length: 55.6 cm (icluding the 8.4 cm handle)
  • Blade Width: 4.6 cm wide at the base
  • Weight: 875 grams
  • Hanbdle Material: Wrapped in Silk
  • Pommel: Round and Flat with 11 Concentric Circles
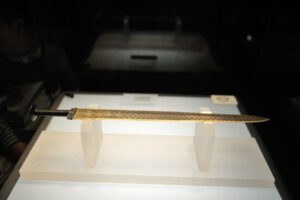
   

Where Can it be Seen.

These days you will have to go to China to see it. There was a time when it would go on display in different countries. However, in 1994 it was on loan in Singapore for a cultural exchange exhibition. During setting the display up some jug accidently banged it on the side of the transportation case and cracked the sword, just a small crack but damn, it’s still a crack. Since then China said, “no way hose” to any exhibition tours again.

The Sword of Goujian is currently housed in the Hubei Provincial Museum in Wuhan, Hubei Province, China

In my view this is one of the most interesting and important finds of the 20th century. I would love to travel there and see it for myself one day.

As always, happy camping :0)


Tanto Knives – A 1000 Year Old Knife Story


Intro.

When it comes to the world of knives each and every one of us has used one, maybe has a favourite one, whether it’s in the kitchen or a tool of thier trade, it might be out camping or hiking, collecting perhaps or the more serious aspect of a real life survival incident.

As a collector I realise there are some misconceptions about Tanto Knives, thats one reason why I wrote this article about Tanto Knives. Any collectors out there who dream about owing a Knife that is more than just a Knife but one that has played a part in shaping certain times of history.

What I’ll Cover In This Article.

  • When it all started
  • How the Samurai Warrior fits in
  • Historical significance
  • What steel these blades are made with
  • How they are made
  • Original blade design
  • How it’s morphed into what it is today

I fit into this group of enthusiats who want to get hold of a knife that we can hold and truly feel we are holding part of history in our hands.
Any self respecting knife colector/enthusiast will know the significance of Swords and Knives in the history of Asia, and none more so than those which were forged in Japan.

My Obsession.

I have a life long dream of owning a Tanto Knife and one as old I can afford to buy. Part of this obsession is writing this article so I can also learn a lot more about their origin, why were they designed as they were, what was the significance in Japanese history, how they have morphed into what they look like today and identify certain misconceptions about their current blade shape.


                Let’s Wind the clock back about 1200 years.


The Birth Of An Iconic Knife.

Firstly, let’s look back in time to the birth of this Blade. Tanto Knives (tantō 短刀 means ‘short blade’ or ‘short sword’) are strongly connected to the social & political aspect of the feudal system in Japan. They date back to Heian Period (794-1185). Because this was a time of civil unrest bladed weapons were in great demand. Because of the limited resources and the need for close combat knives the thinner, shorter Tanto Knife was born, it was carried alongside the longer traditional sword

The Rise Of The Samurai.

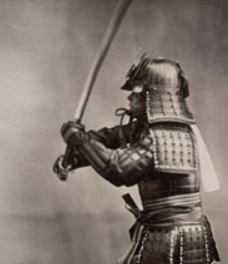
As warriors gained notoriety during the Kamakura period (1192–1333), they were carrying the Tanto Knife as well as their trusty sword for self protection and that of the aristocratic members of society. During this busy time many, many blades were produced to service the demand for them and despite what collectors might want to admit lots of poor qualits bldes were made. It was all about quantity rather than quality at this time.


Historical Significance.

As the centuries pased through the Kamakura and Nanbokucho Periods (1185–1392) & then on through the Muromachi Period (1336-1573) the warrior chieftans (Shogun) ruled the countryside with their swords & trusty Tanto’s, a time when emperors reigned but the Shogun ruled.
In 1534 along came a fella named Oda Nobunaga (織田 信長, (23 June 1534 – 21 June 1582) and was one of the leading figures of the Sengoku period and regarded as one of the first “Great Unifiers” of Japan.


              Blade Steel, it all begins here.

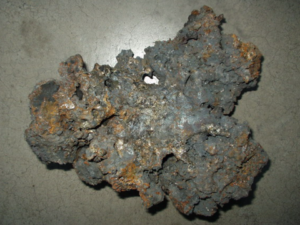
The word tama means “precious”. The word hagane means “steel”. It’s made from Iron Sand (satetsu) predominantly found in Shimane. This forms a carbon steel blade. The carbon content ranges from about .5% to about 1.5%.

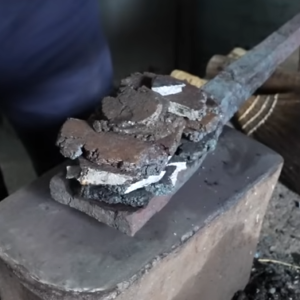
As you can see from this image the Tamahagane is heated, flatened out and then broken into pieces to be assessed and then carefully placed onto a small forging plate to be covered in rice paper and a clay slurry mix to keep it together and from oxygen getting into the steel. This will start the long forging process.

The Tatara.

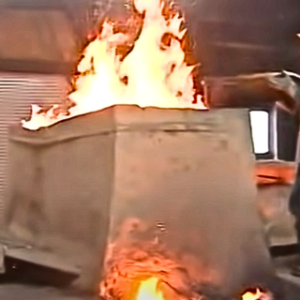
This is a clay furnace of about 4ft x 12ft. The Tatara has air force into it from either side and is heated to about 1000c (1800F) then charcoal is mixed to create the carbon content as the iron sand and charcoal melts down to create Tamahagane.

The Tatara furnace burns for up to 72 hours. When the Murage decides it’s been long enough he calls for them to break open the clay furnace and assess the quality of Tamahagane.

Forging Process.

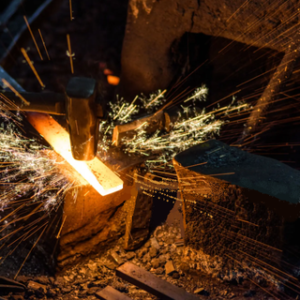
A Japanese Sword/Knife makers forge (Foji) A little anvil sits right next to the hearth and bellows. It makes for a comfortable & practrical work environment.

The steel on a sword gets folded up to 16 times which is a possible 65,536 layers of steel. A Tanto Knife not quite so much, up to 14 layers, this is a possible 16,384 layers.

Foilding and layering the steel like this gives the blades their characterisitc toughness, flexibility and able to keep an edge.

Blade Design.

During the time of Oda Nobunaga (400 to 500 years ago) and in subsequent years the Tanto Knife continued to be made in varied sizes and slightly differing blade shapes but it remained as this parallel blade with a sweeping curve moving towards the tip.

However, things started to change when the Tanto Knife became as much a status symbol as it was a weapon of protection. As such it was produced in a way that needed to be more aesthetically pleasing, perhaps we could even say it was a fashion statement of the day!

Note: This is a priod of time I am most intereted in when it comes to a Tanto Knife due to the care taken to produce them at this time. They are old enough to be steeped in history but not so old that we can find examples not too far from our price range. I know from my own research I can buy one for around US$2000 and upwards for a good one.

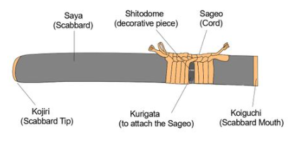
Major Parts of a Japanese Blade.

Decorative Designs & Hara-Kiri!

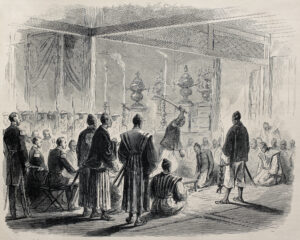
As time moves into the Edo period (1603-1868) & the demand for these weapons diminished due to relatively peaceful times, there came to be many more carefully produced & decorative blades which were for a ceremonial pupose like the Tanto Zashi, dare I say, used for the infamous Hara-Kiri (ritual suicide)!
Note: If we look in the right places we can find very nice examples of Tanto Knives from this era in good condition.

                                                                                       Blade Types
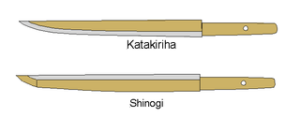
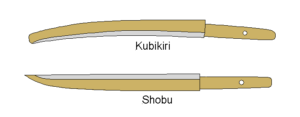
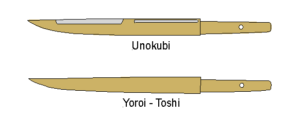
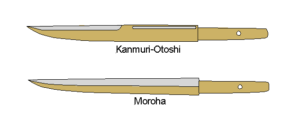
        There are many many blade types produced over the centuries, here are a few of them.         

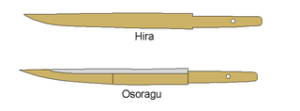
                         Hira – Osoraku

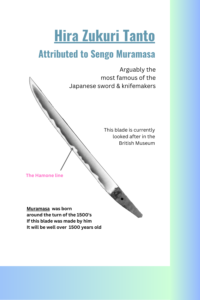
The Hira is a common Tanto design, it usually has a flat grind with no shinogi (a transition between the spine and the blade edge) The Osoraku features a very long point, it starts narrowing towards the tip for over half the blade’s length.

                     Katakirinha – Shinogi

The Katakirinha has a similar shape to the Yoroi-Toshi a slender knife but with a chisel ground edge. The Shinogi is actually created from a cut down broken long sword, this is why there is the familiar angled tip we see on this blade.

                         Kubikiri – Shobu

The Kubikiri is a very rare, a curved blade with the edge being on the inside and a blunt point, there is a bit of mystery about this knife but the name Kubikiri means something like head cutter, that should give us a clue! The Shobu similar to the Shinogi in that the narrowing starts at around half the total blade length but doesn’t have that distinctive angular tip, it’s a much sharper looking point.

                     Unokubi & Yoroi-Toshi

The Unokobi is quite uncommon, it featrures what we might know as a swedge and a groove (fuller) along it’s spine. The Yoroi-Toshi has a thick triangular cross section, used for stabbing piercing armour.

                   Kanmuri-Otoshi & Moroha

The Kanmuri-Otoshi is very similar to the Unokubi but the front swedge travels all the way to the tip and has a groove (fuller) along the spine. The Moroha. these are very rare, it features a diamond cross section that travels all the way along the spine creating a double edge.

                     Kisaki Moroha-Kubikiri


The Kisaki Moroha is similiar to the Unokubi but the swedge is shorter and travels all the way to the tip.


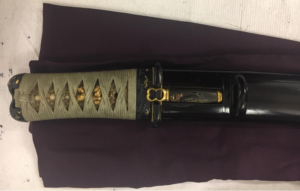
The Scabbard of the Tanto Kife (the Saya)

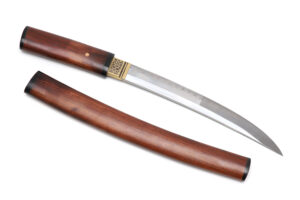
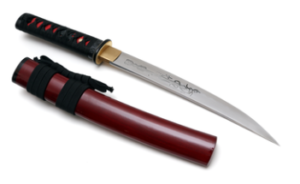
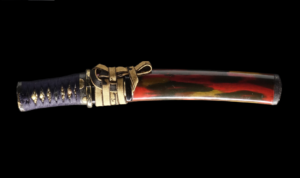
Just like the rest of the knife the Saya is an important part of the finished knife. Depending on who it was made for they could be a simple curved wooden sheath finished in laquer (bottom middle). This one to the left is currently held in the British museum, it’s from the Edo period. They were often adorned with special clips to hold the Saya in place and wrapped with a ribbon like material made of cotton or silk. It’s originally used for tying the knife to the warriors Obi (sash).

        Example of a Historical Saya


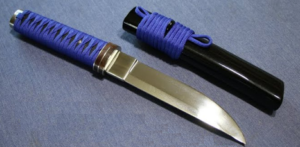
        Example of a Modern Tanto


                    Mid Nanbokucho period

This one has an amazingly ornate Saya. Believe it or not it’s from the Mid Nanbokucho period (the first year of the O-An era in 1368), hard to believe it’s 655 years old!!

             Beautiful at 600 Years Old!

And this one is another one of about 600 years old, it’s astonishing!

              Tanto Knives In the Modern Era

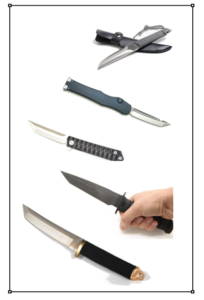
As more and more collectors got interested in Japanese blade making and the Tanto design then so did the manufacturers. Here are a collection of knives, some handmade by the hobbyist others made by manufacturers. Either way they have all latched onto the idea of building in this angular point. Due to this there are so many people think that the original Tanto’s were all like this. As you can see from the sketches above, the Shinogi was the only one that had this angular point as it was cut down from a longer sword like a Katana which was broken. I guess it was due to popularity but the modern knifemakers all started producing them.

600 years later this style is still so popular as you can see in these examples.

                    Modern Tanto Blades


Can a Knife Penetrate Kevlar?


Intro.

Just about everyone has heard of Kevlar. We mostly know it as vests worn by military forces, security agents, police, body guards, aerospace. Actually the list of uses is quite vast. In this article I attempt to briefly explore its history and more pertinently “Will it stop the penetration of a Knife Blade”.

History.   

Kevlar is quite a remarkable material. It was developed by Dupont in the 1960’s. It’s a synthetic fiber with incredible strength and durability to withstand various attacks on it.

In 1965 a chemist by the name of Stephanie Kwolek was doing research on certain high performance polymers. She was trying to find a good strong lightweight fiber to be used in radial tires. She discovered a unique solution which formed these rigid rod like molecules whilst spinning it. The spinning technique she developed led to the creation of this material which turned out to be 5 times stronger than steel by weight. By 1971 the material we now know as Kevlar was fully developed and introduced to the world. The rest….as they say, is history.

As companies around the world began to use the material they required certain types of material to support specific performance criteria.

  • Kevlar 29 – (The original fiber matrix known for its impact resistance, common use is for body armor & helmets)
  • Kevlar 49 – (This has really good strength and rigidity, most commonly used in aerospace and rocket motor casings)
  • Kevlar 129 – (This variant is very strong but flexible so they use it to reinforce tires and conveyor belts, it can handle a lot of impact, it may suit a situation for protection against *knife attacks)
  • Kevlar XP – (This one offers increased ballistic performance and is predominantly used in ballistic vests and helmets)
  • Kevlar AP – (Another variant augmented for ballistic protection, designed to minimize the affect of bulging and spreading on the rear of the material. It can also withstand* a certain amount of penetration attempts from a knife)
  • Kevlar KM2 – (Specialized for use in marine environments. Used for ropes and cables etc..)

                             Kevlar Vest

We can clearly see this soldiers                 camouflage Kevlar Vest

                       Kevlar Material

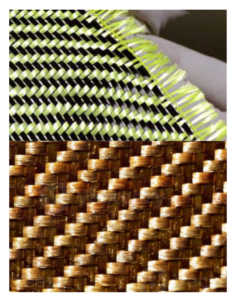
This is a close up of Kevlar material.                          The stopping affect is achieved by                         sewing many layers together.

At the moment this article is based on my own research, that is, excluding getting hold of a few pieces of Kevlar and doing in house testing. Note: I will conduct these tests in the future but for now, this is what my research tells me.

Of the 6 main Kevlar products listed above there are two that get a mention more than once when it comes to Kevlar stopping a knife blade. Please be aware that none of them are foolproof in stopping a blade from penetrating this material.

The nature of Kevlar is that it’s made from woven fibers. These fibers have a very high tensile strength which lends itself to resist the stretching and separating of them. The woven material is stitched together in layers, the layers play an important role in slowing the bullet down as it passes through each one. It kind of dissipates the kinetic energy over a small area to finally come to a stop, hopefully before it does the ultimate damage. As such this material is way better at stopping a blunt ballistic object than a knife blade.


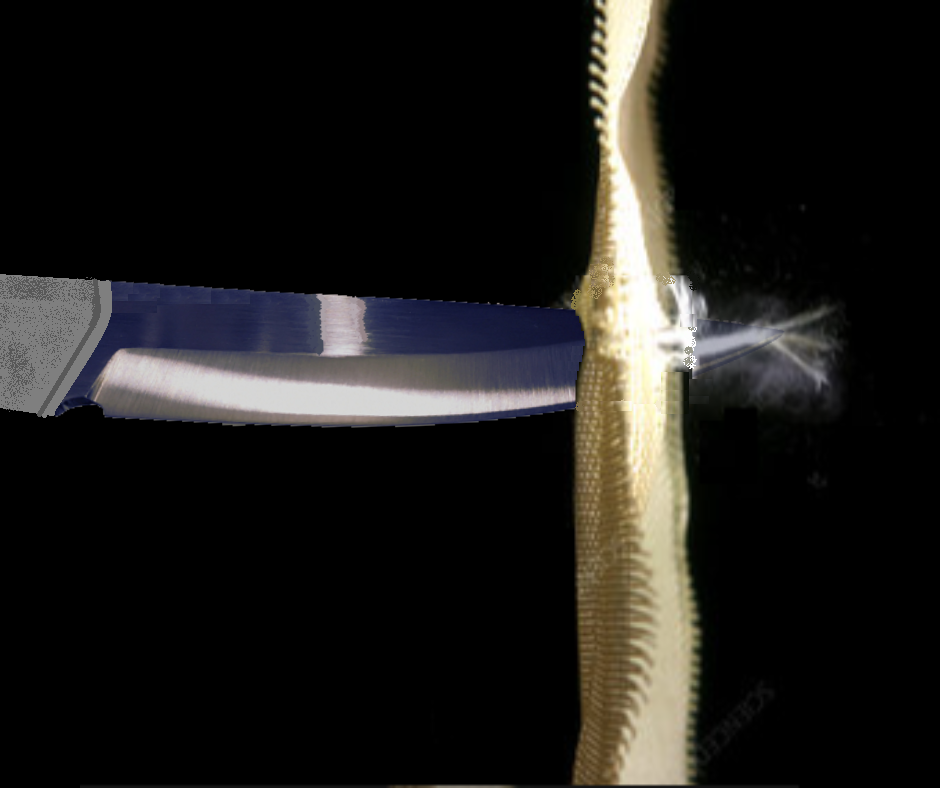
*Now, when it comes to Knives it’s a different story. As we know bullets exert a force of a small area but a knife exerts it’s force to a very small area, almost a singular point, where it’s tip is more likely to separate the fibers and pass through them. How far it passes through depends on so many things. The force of the stabbing action, the shape and size of the tip to name a few. A very sharp, hard solid blade could also cut the fibers where a bullet won’t. You can now see that there is no single answer to this question.

So the two that get most mentions for resisting a knife attack is Kevlar XP and Kevlar AP. Kevlar XP is a variant of the original product for enhanced ballistic and cut resistance. Kevlar AP (Advanced Performance) is also a variant developed for certain strength and protective characteristics. NOTE: I reiterate, no-one can guarantee any Kevlar product will stop a knife penetration. Tests suggest that it can have certain penetration resistance affects but depends highly on a number of things already mentioned.

Conclusion.

Whilst Kevlar, in all it’s forms, stands out as the number one product for stopping life threatening gun shots it is limited in it’s effectiveness in it’s ability to stop a knife attack. This is due to many factors like, where the force is concentrated, blade sharpness and motion.

If push comes to shove and I was to walk through a very dangerous area where knife attacks are prevalent I would still rather wear Kevlar than not. It may resist enough of the force of the blade to make good your escape or it may not.

As of March 2024 Kevlar still seems to be the number one product when it comes to an impact resistant, lightweight and flexible self protection material.

As always, happy camping :0)

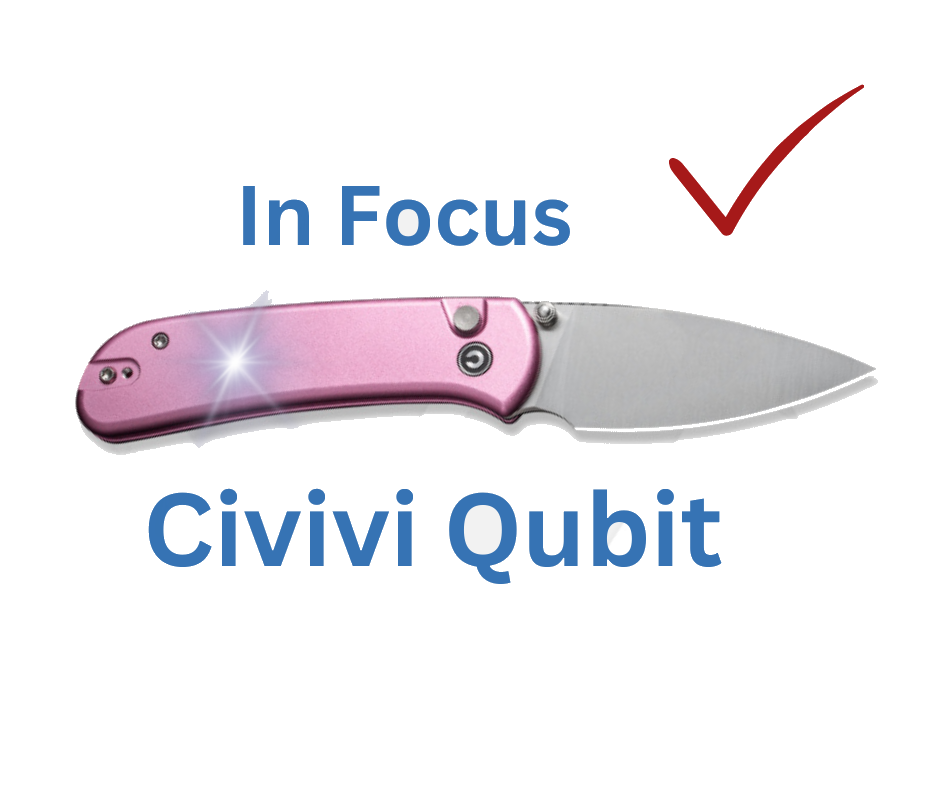
Midweek Knife In Focus: The CIVIVI Qubit Button Lock Knife in Pink Aluminum


Intro.

How about this pink gem. It’s one of the new arrivals on the market. It’s a pretty small knife but one that might suit the ladies with scales in a sort of bright pink color…. Yes, I know just because it’s pink it’s not only for the ladies :0) Anyway, here are the specs on it.

  • Overall Length: 7.19″
  • Blade Length: 2.98″
  • Cutting Edge: 2.68″
  • Blade Width: 1.24″
  • Blade Material: Sandvik 14C28N
  • Blade Style: Drop Point
  • Blade Grind: Flat Satin
  • Handle Length: 4.21″
  • Handle Width: 1.00″
  • Handle Thickness: 0.43″
  • Handle Material: Pink Aluminum
  • Weight: 2.82 oz.
  • Pocket Clip: Tip-Up
  • Opener: Thumb Stud
  • Pivot Type: Bearings
  • Lock Type: Spring Button Lock
  • Brand: CIVIVI
  • Model: Qubit
  • Country of Origin: China

As you van see it’s a ‘Button Lock’. I have never owned a button lock knife but by some accounts they are a very safe locking mechanism. Generally speaking they won’t close on you whilst in use. This is why I like ‘Lockback’ knives, I’ve never known onme tyo close on me. I can’t say the same for a liner or frame lock knife!

It has a just over a 2.5 inch cutting edge and the whole thing is a little over 7 inches when fully open and just over 4 inches fully closed. For me this knife is perfect for those moments when you want to take a small reliable blade with you. It has a nice chunky 1.25 inch wide blade which looks great. As such itg’s capable of completing a more than just opening boxes! Being a putrid pink color you won’t lose it. The handle is nicely shaped, it’s very comfortable they say!

We can class this CIVIVI Qubit as a budget friendly knife that comes from the sister company of WE Knife Co. I know WE Knife Co make verey nice knives with a reliable quality. So you can expect a bit of quality with this one.

The blade mnaterial is 14C28N. Made by Sandvik and specially for knife blades. Kershaw have used it, Ontario kitchen cutlery use it, Italian compay called Nilte use it, and now some Chinese manufacturers use it. For those interested it has Carbon, Chromium, Manganese, Nitrogen, Phosphorus, Sulfur & Silicon. The elements are balanced in percentages to produce a fine grain. It takes and edge very well and capable of around 62HRC if properly heat treated. I’d say that’s awesome!

Blade deploys via a thumb stud and button. With a ball bearing pivot it’s opening is as smooth as a White Russian Vodka. Female or not anyone will enjoy this little knife. Actually don’t fret, it comes in Purple, Red, Green, Blue, Black & of course Pink.

So why not get one for yourself, order yours today.

As always, happy camping :0)


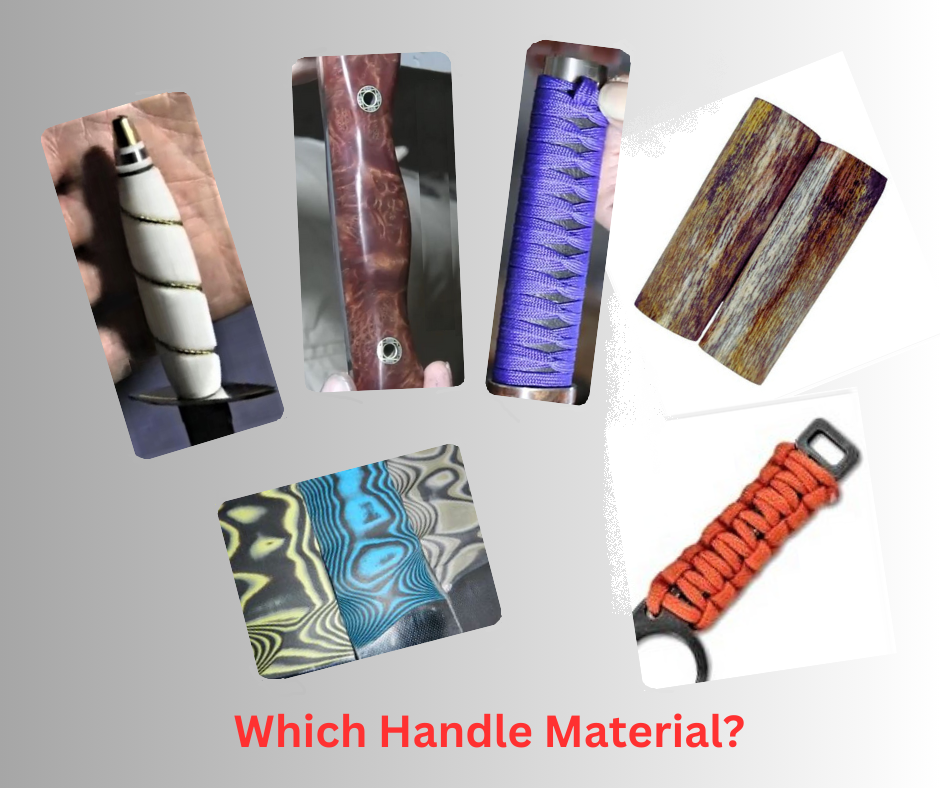
The Best Knife Handle Material.


Intro.

I know, I can hear you, “it’s just a knife handle, what’s the fuss about”? In many ways you’d be right, whatever handle the knife comes with is fine right? Up to a point, yes, however there are a few things to look out for if you are serious about the longevity and practical functionality of your Knife.

Along with half of the knife-making fraternity I’ve been messing around with different knife handle material for a long time. I’ve tried making and using my own Micarta, I’ve tried many different types of wood including stabilized and non stabilized, G-10, and materials I’ve found lying around the workshop.

If you are a knife-maker there is one thing advantage to being fussy about handle material (or ‘scales’ as they are usually known as) and that is it gives you some unique attributes to the design of your knife. You can even make the color as part of your business identity. Making your own handle scales does that for you. If you get it right it’s well worth it.

In this article I’ll try to explore as many types of materials used for knife scales and perhaps explore the positives and negatives of them. Keep reading I hope you enjoy the article.

Here are the Most Common Materials.

  • Wood
  • Bone
  • Antler & Horn
  • Metal
  • Micarta/G-10/Carbon Fiber
  • Plastic & Synthetics
  • Paracord Wrap
  • Other Natural Materials

Types of Wood.

How many species of threes are there? Ha, according to some data sets it’s estimated that there are roughly 60,000 to 80,000 species of trees globally. Well, if you have a couple of decades to spare I can go through them all and see if they are any good for Knife Handle Scales :0)!!

The point is of course that there are so many to choose from that you could put a different type of wood on each new knife you make and never run out of different species of tree wood to use. The most important aspect of using wooden handle scales is whether or not it’s stabilized or not. We can also look at the density of the wood and this has an impact on the hardness of it and it’s ability to soak up the stabilizing resin. Let’s digress for a moment and talk about the stabilizing process.

  • Put simply this is a process whereby a type of resin is forced into the fibers of the wood under pressure and left to cure. This produces a solid piece wood that is impervious to water and the regular decay you might see in wooden products.
  • What they do is place the wooden blanks in a vacuum chamber whereby the air is pumped out to remove remove it from the porous structure of the timber fibers allowing the resin to penetrate into it.
  • There are a few types of resin such as a 2 part epoxy or an acrylic solution. One type of resin nearly all knife-makers have heard of if not used themselves is one called Cactus Juice. This not juice sucked out of a cactus plant. It’s a solution originally derived from petroleum refining which has a composition made up of ‘methacrylate ester monomers’ the easiest way to make sense of this name is it is to say often used in products such as plexiglass. It has a low viscosity making it easier to penetrate deeper into the wood.
  • When this process is completed it makes the wood very hard wearing, strong and resistant to decay and protect it from various forms of moisture attack. It sand so nicely and all it requires after shaping is buffing up to a glossy finish.

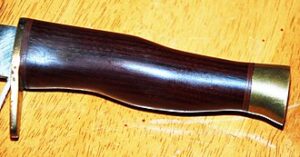
Here in Perth Western Australia I like to use a local wood that only grows here, it’s called Jarrah. It’s super hard wood and quite frankly hardly needs resin stabilizing but we like to do it anyway. Most of the hard woods like rosewood, cocobolo, and ebony are used widely due to variations in their beautiful colors and grain.

Bone Material.

  • Camel bone is sometime used because of its unique color and texture. Camel bone handles vary in color from ivory white to beige and even orange tones. They are durable and very resistant to wear and tear…not cheap though!
  • Cow bone, as we would expect this is a cheap alternative. Each year in Australia alone, somewhere between 7 and 8 million cattle are slaughtered, that’s a lot of bones! It’s pretty versatile stuff. You can polish it to a glossy smooth finish, tone it down to a satin look or texture it quite easy. Cow bone durable and affordable, check some out when you have a minute.
  • Giraffe bone has an amazing look to it, I used it on one of my custom builds.

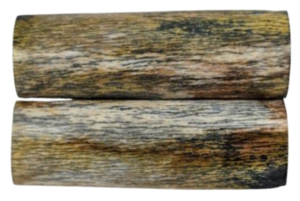
  • You can see by the picture that it’s almost got a timber like grain running through it. It ranges from a more plain white grain through to a spotted, mottled look. Some are dyed with many colors to choose from. Along with other bone and horn products it’s very hard wearing. This makes it quite unique. Knife nerds and collectors love it.

Antler & Horn Material.

There is a ton of this out there. You make your choice and stick it on your knives. Just imagine, every year animals are growing new handle scales for us, so nice of them eh :0)

Thanks mate, looks like you have already donated at least one set of handle scales, cheers :0)!

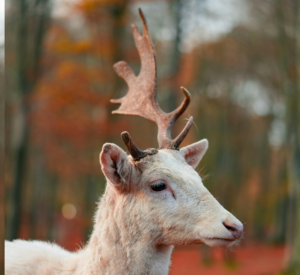
This material has been used for thousands of years. There over 50 species of deer alone, including white-tailed deer, elk,, moose, red deer and reindeer. Then there are the choices of Horn material like cow, sheep and buffalo and the list goes on. It’s really good material to use and is sustainable if harvested in the right way.

Here some Handles Scales growing on this Aussie Highland Cow!

Being a natural material that grows on an animal it has some ‘give’ in it which allows for a certain amount of shock absorption. Made from Keratin they are very strong and resistant to moisture. The aesthetics if it lends itself to certain blade types like Bowie Knives. It seems to fit nicely with the thoughts of going into the wild on a hunting trip with a Bowie adorned with elk antler scales, strapped to your side.

Metal Handles.

Anodized Ali Handle is often a metal of choice


One of the drawbacks with metal handles is the weight of them. Depending on the weight of the blade the knife can be back heavy creating an unbalanced experience. Although Titanium & Stainless Steel is used the majority use Aluminum. They are often anodized to interesting colors. As you would expect they are very resistant to all of those undesirable affects that lesser materials might bring. They can be textured and shaped as well as any wooden or composite material. I do know they can be a little uncomfortable in extreme cold conditions. They take a while to warm up compared to Antler or G-10 for example.

Composite Materials.

Here is an example of home made Micarta.

From making my own Micarta to Carbon Fiber I’ve used just about all of them at some point in my knife-making career. If you make your own Micarta you’ll soon realize it’s a very messy process with mixed results. You can end up with wedge shaped blocks full of holes. If you do this be sure to experiment a lot and be prepared to use up lots of resin before you stick it on one of your knives.

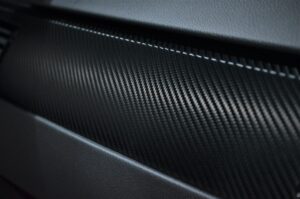
Carbon Fibre is a common choice these days. It looks modern and has that interesting light interference depending on what angle the light hits it at. It’s light and impervious to a lot of those nasties a knife handle is affected by.

Carbon Fiber Material

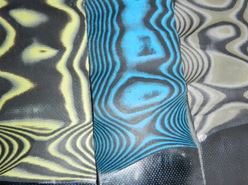
For me I usually end up going back to G-10, it’s made well, heaps of colors to choose from and carries all of the pluses we look for. Resists impact, impervious to most chemicals, moisture resissant & very grippy even with light texturing.

G-10 Material

Plastics and Synthetic.

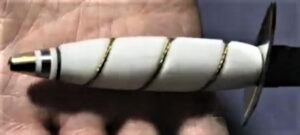
These materials seem to fit mostly into the affordability range. They are cheap to produce and the sources are almost endless. I’ve even used layers of white acrylic material to simulate an ivory affect as in the handle of this dagger I made.

The choices range from ABS plastic, Nylon, Polymer Blends of all descriptions. They may not be as hard wearing as Deer Antler or G-10, but it’s practical and functional and does the trick on a budget blade.

Paracord Wrap.

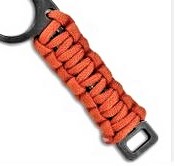
Typical Paracord Wrap fitted directly to the blade tang.

As you would know there are oodles and oodles of colors and thicknesses of this material to choose from. It’s applications are far and wide. A well known knife-make wraps the handle and then coats it in a resin. The result is a grip level that probably cannot be surpassed. With this treatment it’s very hard wearing and can boast a long lasting alternative solution to handle scales. Here is one of my builds on a modern take on a Tanto Knife.

  Modern Material, Traditional Style!


Other Natural Materials.

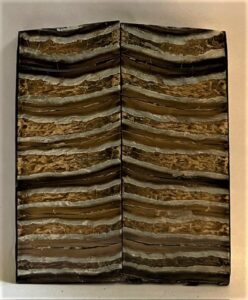
There are plenty of other materials to use if you so desire. There is a fairly well known You Tuber who built a knife out of a shovel and Concrete, concrete being used for the handle material. Although I’d steer well clear of using concrete it does show how diverse you can be when choosing handle material. I’ve known various kinds of Stone to be used, again not recommended as they are far too brittle and a bit on the heavy side. Mammoth Tooth can also be used. As far as I’m aware mammoth teeth are all really fossils out of the Pleistocene era. In that case it’s really stone like material. It looks good but not sure about its effectiveness as handle scales.

Mammoth Tooth.

There so many others you could use. Leather is a great choice, it has that natural look we all love. Then there is Mother of Pearl (mainly for inlays) Coconut shell, Bamboo ….. shall we go on? Suffice to say there are plenty of choices. The sky’s the limit as they say.

Conclusion.

Needless to say but choosing the right handle material plays a part not only to it’s functionality but also in the aesthetics of the final piece. The intended use of the knife will determine which direction you’ll take. A light use knife will give you a wider scope of materials to choose from. A 4 week survival adventure will need the hardest wearing material you can find (Antler or Cow Bone perhaps). So there you are, the aesthetics and the intended use will eventually steer you in the right direction whether buying a knife or making your own.

There is one fact often overlooked when it comes to knife handle scales, and that is it gives you a uniqueness that, in almost all cases where a knife-make builds his or her own knife with natural handle scale material it’s almost guaranteed that no-one else on the planet will have done exactly what you have done. It can be part of your identity as a knife-maker. So good luck with it.

As always happy camping :0)
How do I temper a Knife Blade?


Intro.

So you’ve spent many hours getting this far. You’ve designed, shaped, rough ground the bevels and hardened it. At this point is is a functioning knife….kind of. That is, you could sharpen it, it would take a very keen edge but the first time you cut something hard the edge might chip off or even if you dropped it onto a hard surface it might break in half. This is all assuming that the hardening process was done right. This article explores what the tempering process is how to do it.


What is Tempering?

As we have described, it’s an essential step in the whole process, otherwise you’ll have a fancy butter knife. You may have a heard of “Hardening and Tempering”, well we’ve assumed you’ve done the first bit, now we are going to do the second bit. Tempering is something of an art to master. On the face of it, it’s a simple process. I could describe the prior steps and temper like this:

  • Bring the steel up to temperature
  • Quench it
  • Temper it

Easy, right? Hang on a sec. There is a whole lot more goes into it than this. This process has to balance the hardness, toughness, resilience, durability, edge retention, at the same time we need to take out the brittleness achieved during the Hardening Process. If we don’t get it right one or more of these could be compromised.


So what is the correct temperature?

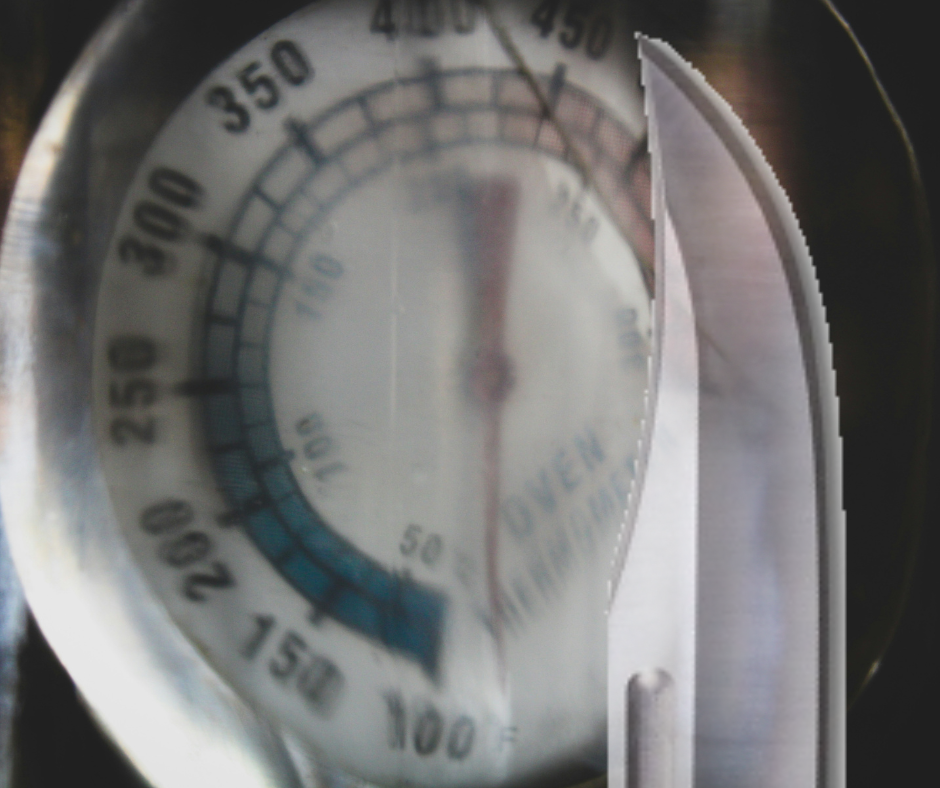
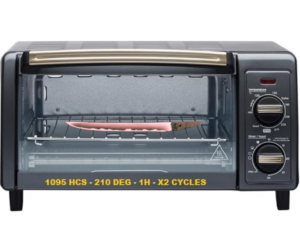
I wish there was a one size fits all Temperature that would be perfect for all types of steel. But there isn’t. For example, I temper 1084 High Carbon Steel at 392°F (200°C) and 1095 High Carbon Steel at 210C (410°F).  Temperatures range from 350°F to 600°F (177°C to 316°C). Each and every forge or kiln can vary a bit as they are not all calibrated the same. So there will be some trial and error to determine the exact temperature you will use.

As long as you can maintain a constant temperature even an old toaster oven will work.


Types of Steel.

If you are new to knife-making you may not be aware of how may different alloying ellements make up steel that can be hardened. Actually there are dozens which could be used. Here a few of the most common ones:

  • Carbon
  • Manganese
  • Chromium
  • Molybdenum
  • Vanadium
  • Nickel

Remember, all of these different ellements have a particular strength that requires handling in a particular way, the temperature has to be right to bring the best out of it. Carbon is the number one ellement that must be included, without it you don’t have hardenable steel, and that’s the end of it. It’s responsible for the steel gaining so much strength and brittleness. Manganese is known for improving the hardness by reacting with the iron content and keeps the steel a little cleaner with fewer impurities. As you would expext the Chromium content creates a stainless type of steel much more resistant to corrosion. Including Molybdenum and Nickel into the recipe further improves the hardenability at higher temperatures, like you would have to do with stainless steel blades. Vanadium improves the grain structure and plays a part in its final toughness and wear resistance.

Each type of steel has different amounts of each one of these giving it unique properties that need to be heat treated and tempered accordingly. The manufacturer creates the steel and puts the steel through its paces and does extensive testing, testing and more testing. Each manufacturer should have a document available which tells you exactly what temperatures their steel requires to get the most out of it.

People deviate from this a lot trying to get a little more out of the steel than the manufacturer did….really? Well, it’s fun trying I guess, and one particular knife-make might have a unique use for the steel that needs his or her special treatment.

There are other factors that affect the overall performance of the steel. We’ve talked about steel composition and temperature but holding time and the cooling rate also affect it. Holding time is the amount of time the steel is kept at the desired tempering temperature. Normaly we would bring it up to the desired degrees and as soon as it gets there we take it out and then let cool at it’s own rate. What you could do is bring it up to temperature and hold it there for, let’s say 5 minutes, then let it cool down. Or you could hold it at temp for 5 minutes then rapidly cool it down. All of these things affect the end result.


What’s happening on a Micro Level?

As already described the blade comes out of the hardening process very brittle. This makes the steel prone to cracking, chipping or breaking and resilient to things like impact deformation. As the newly hardened blade is brought up to the appropriate temperature it begins to change the crystal structure back to something more manageable in terms of a practical Hardness/Toughness balance.

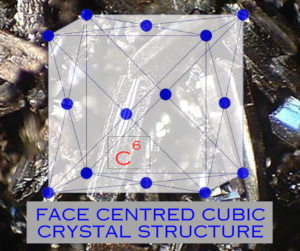
Believe it or not steel is made up of a crystal structure and how the crystals change form will determine the effectiveness of the temper treatment. To get very technical here the steel forms new, more reliable grains and carbon atoms that were in a solid state start to disperse and create smaller, stable carbides. The steel becomes less brittle and tougher which helps stop cracks forming.


Other Tempering Techniques.

  • Differential Tempering. This is similar to what you might see a Japanese Swordsmith do when hardening a blade. They coat the blade in varying thicknesses of a kind of clay looking sloppy mud type of mixture. If done correctly with the tempering process it will allow the control of the softer spine and the harder cutting edge.
  • Cryogenic Tempering. This involves immersing the blade into a chamber of liquid nitrogen and lowering the temp down to as much as -185°C (-301°F) or even lower if so desired. Then the metal is held at this temp for a specified period of time. This can be hours or a day or two depending on what’s required. Then it’s brought back to life at room temp. All of this hastle is to releive the stress in the steel, creates a harder blade with increased wear resistance and toughness. Usually only high end stainless steels go through this process.
  • Double Tempering. Double tempering is just what it says. The blade goes through two consecutive tempering cycles with a dunking in water in between them. This process is just like all the others. The desired outcome is all the improvements we’ve talked about before, resulting in improved wear resistance, toughness and stability.


Conclusion.

As i’ve said before it’s super critical to take this step in the creation of a masterpiece you’ve worked so hard to create. The process should be meticulous, well structured and well organised. It would pay you to keep a record of what you do as each time you do it you learn something, especially in the early days. In short, yes, you can do your own tempering. Yes, it can be very effective. Yes, it’s a bit on the dangerous side so keep yoursleves safe. Wear your PPE so you can live to make another knife another day.

As always, happy camping :0)